


Configuring Microsoft authentication for a Microsoft Power Pages website


When you create a new Power Pages website with a Microsoft Power Platform environment, both Local sign in and Azure Active Directory are enabled, and the rest (Azure Active Directory B2C, Facebook, LinkedIn, Google, Twitter, and Microsoft) are not yet configured. To see this for yourself, follow these steps:
Go to make.powerapps.com and log in if prompted.
Check the environment listed in the top-right corner and change it if necessary.
Scroll down until you see Your apps.
To the right of your Power Pages website, hit the ellipsis (...) and select ✏ Edit.
If prompted, choose Try Power Pages.
Once the Power Pages editor opens, choose Set up from the side menu.
Within the Set up menu, choose Identity providers.
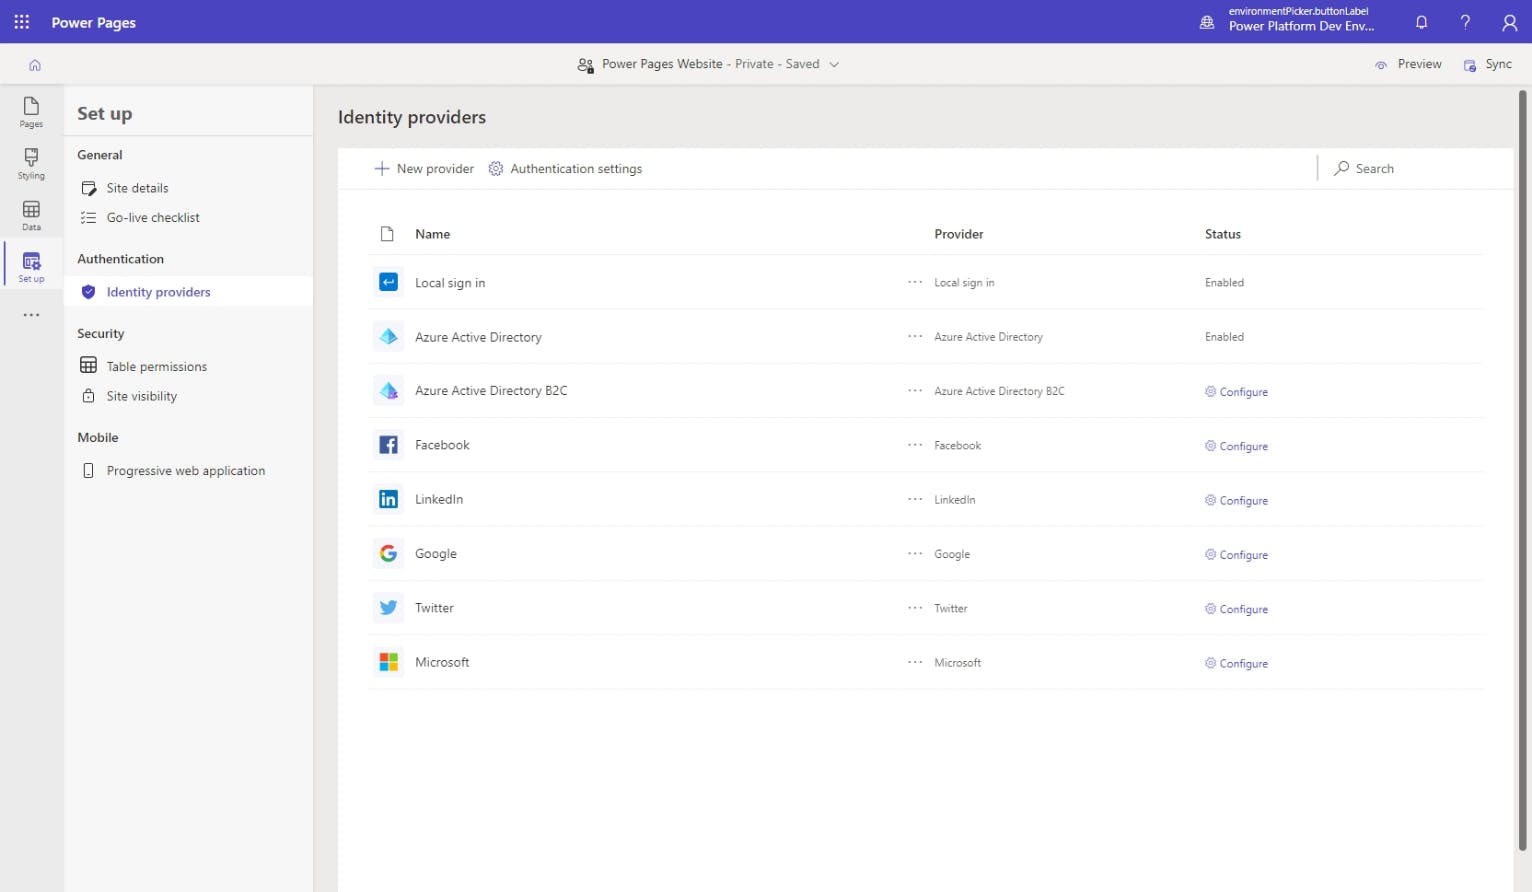
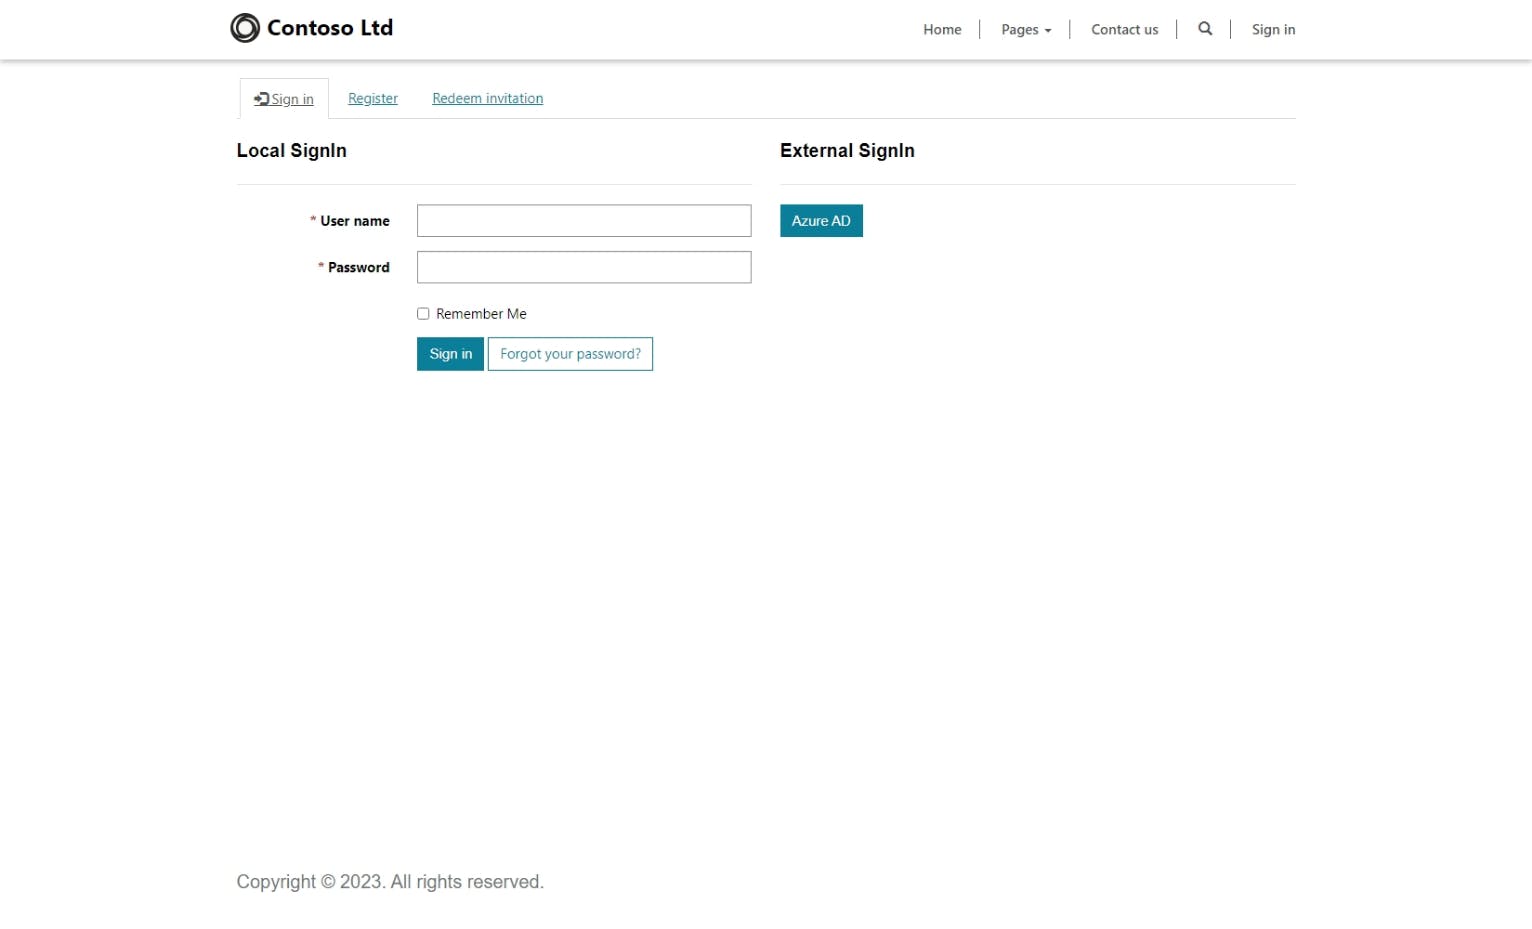
Similarly, if you view the sign-in page of your Power Pages website at your custom domain name or [your-power-pages-website].powerappsportals.com/signin, you'll see that your login options are local log in (called Local SignIn) on the left and Azure Active Directory (called Azure AD) on the right.
In this tutorial, we're going to configure our Power Pages website to use the Microsoft authentication method, including exploring the various authentication account type options.
Configure the Microsoft identity provider
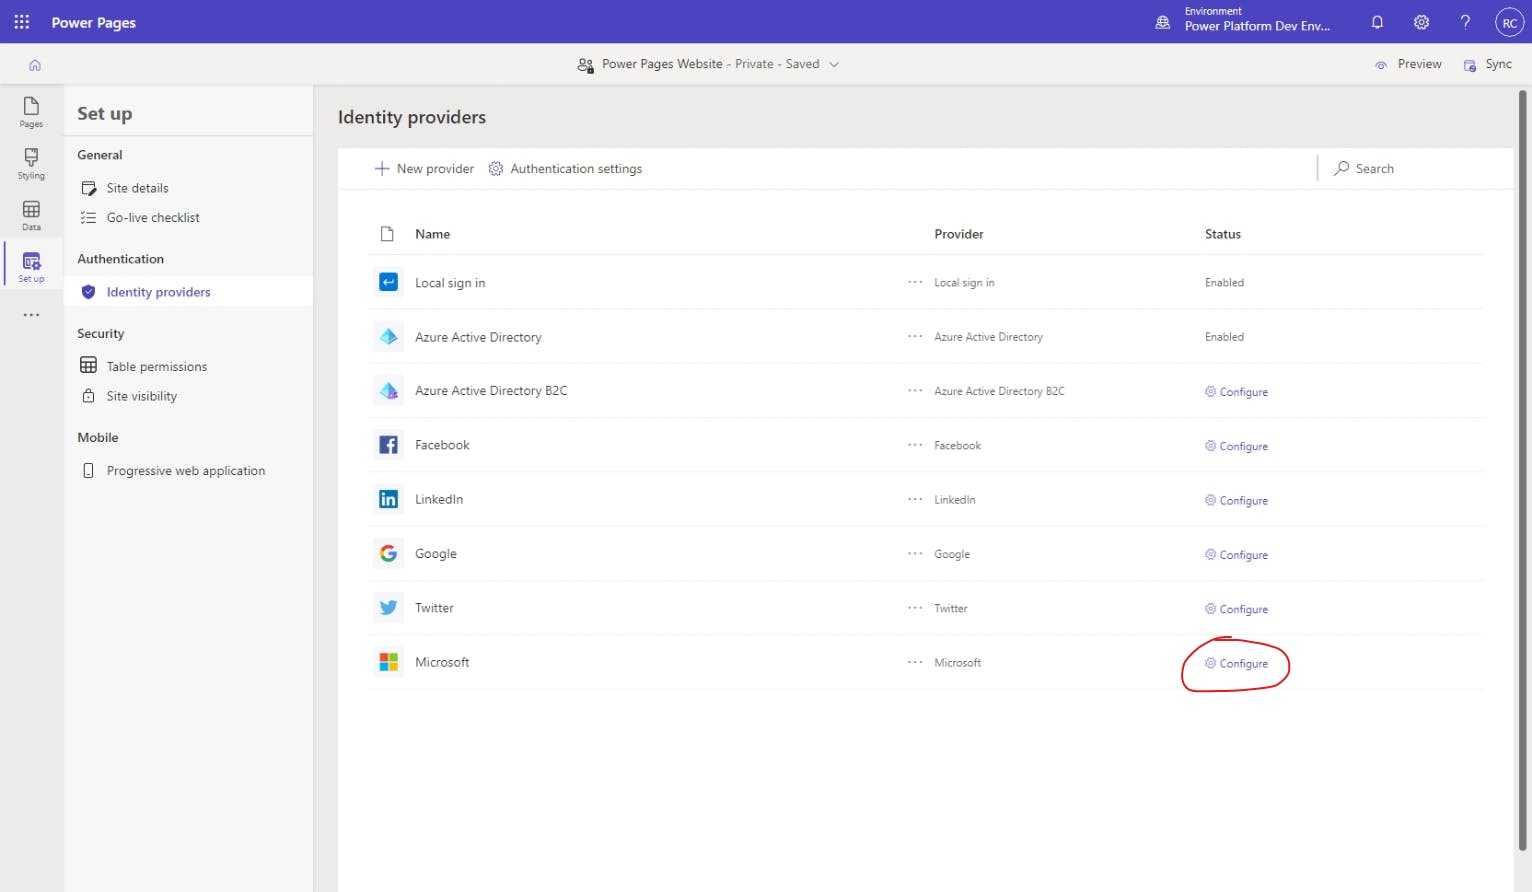
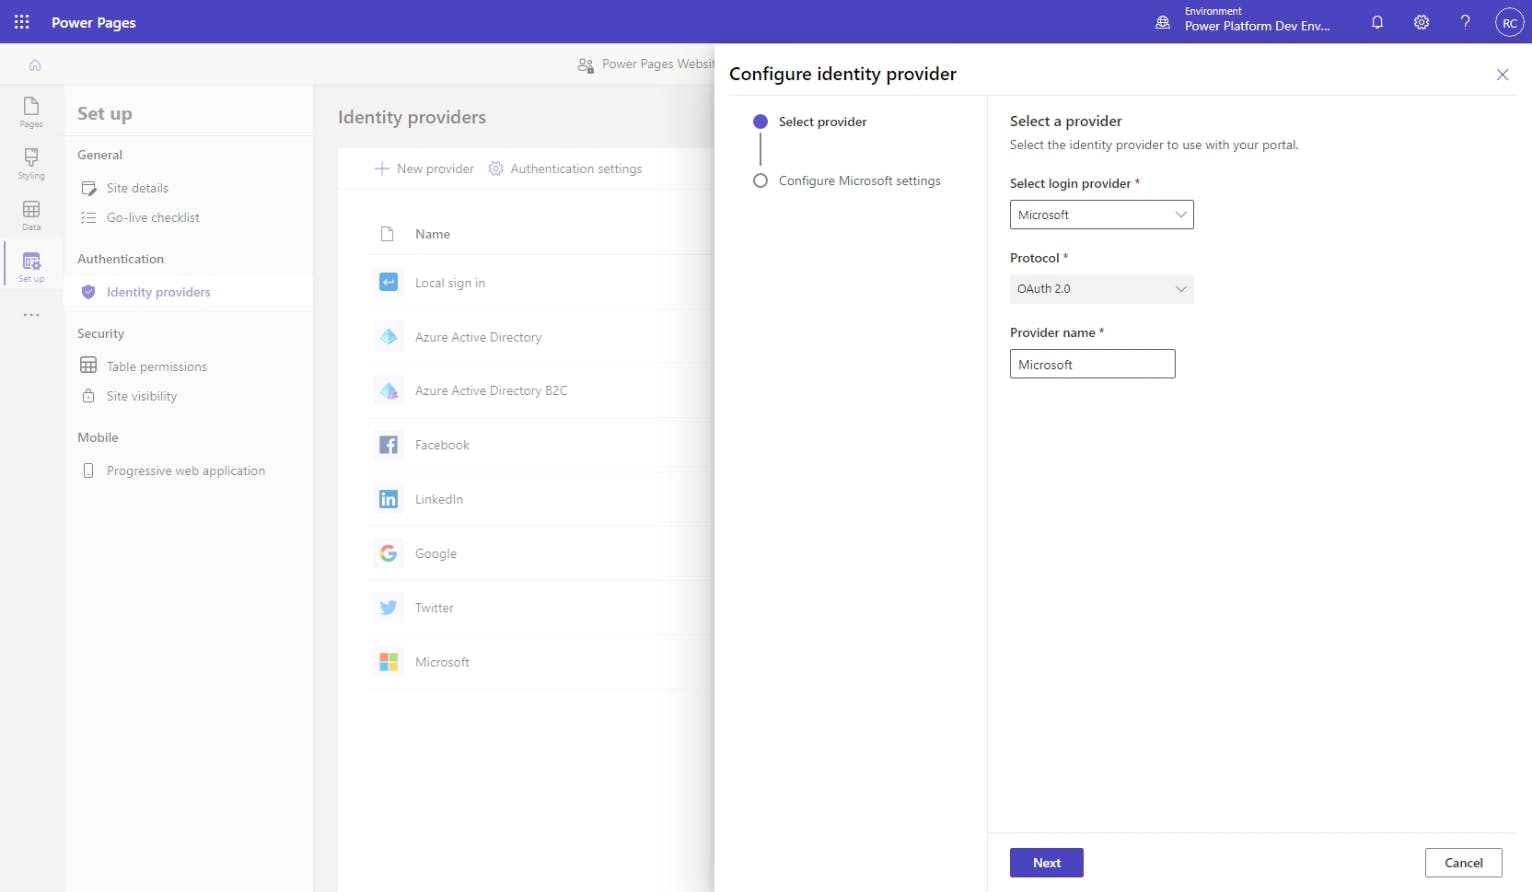
From the identity providers list, to the right of the Microsoft provider, select ⚙ Configure.
On the Configure identity provider flyout menu, you should leave the defaults selected for Select login provider and Protocol, but feel free to change the Provider name to something that will make sense to users of your website. Then hit Next.
Next, we need to create a new Microsoft application registration for our website. The application registration is how we tell Microsoft which domain(s) are allowed to use this authentication method, which types of accounts are authorized, and other login process configuration details.
On the Configure Microsoft settings step of the Configure identity provider flyout menu, hit the link to Open Microsoft.
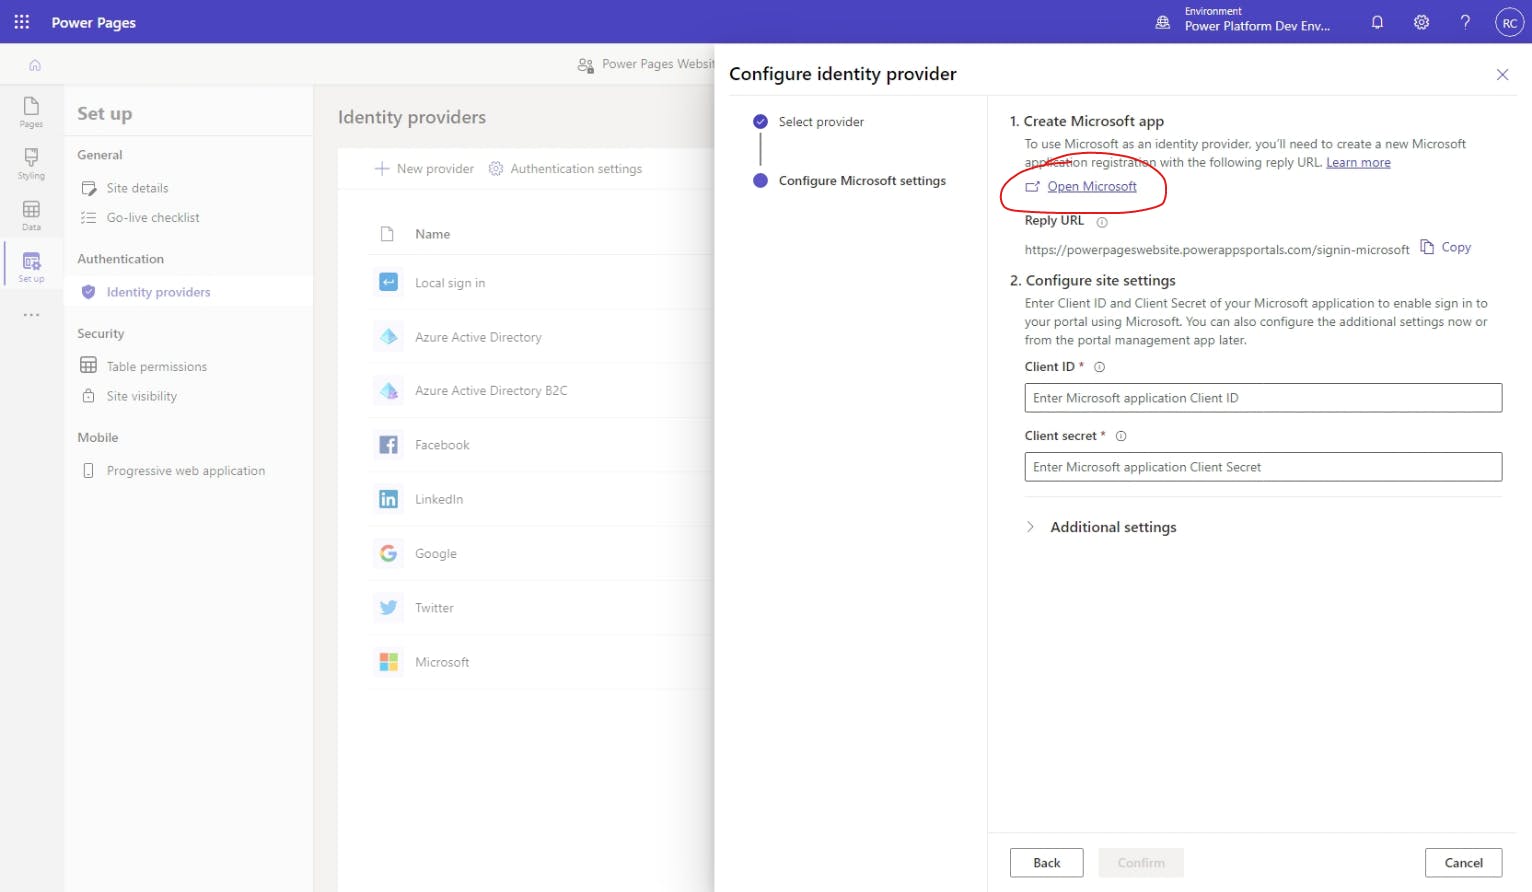
If prompted, log in using the same account as you used when logging into Power Apps.
Do you need a new app registration?
In most cases, despite the instructions from Power Pages, you don't actually need to create a new app registration. This is because Power Pages actually creates a new app registration for you when you create a new website.
Configure the Microsft Azure app registration
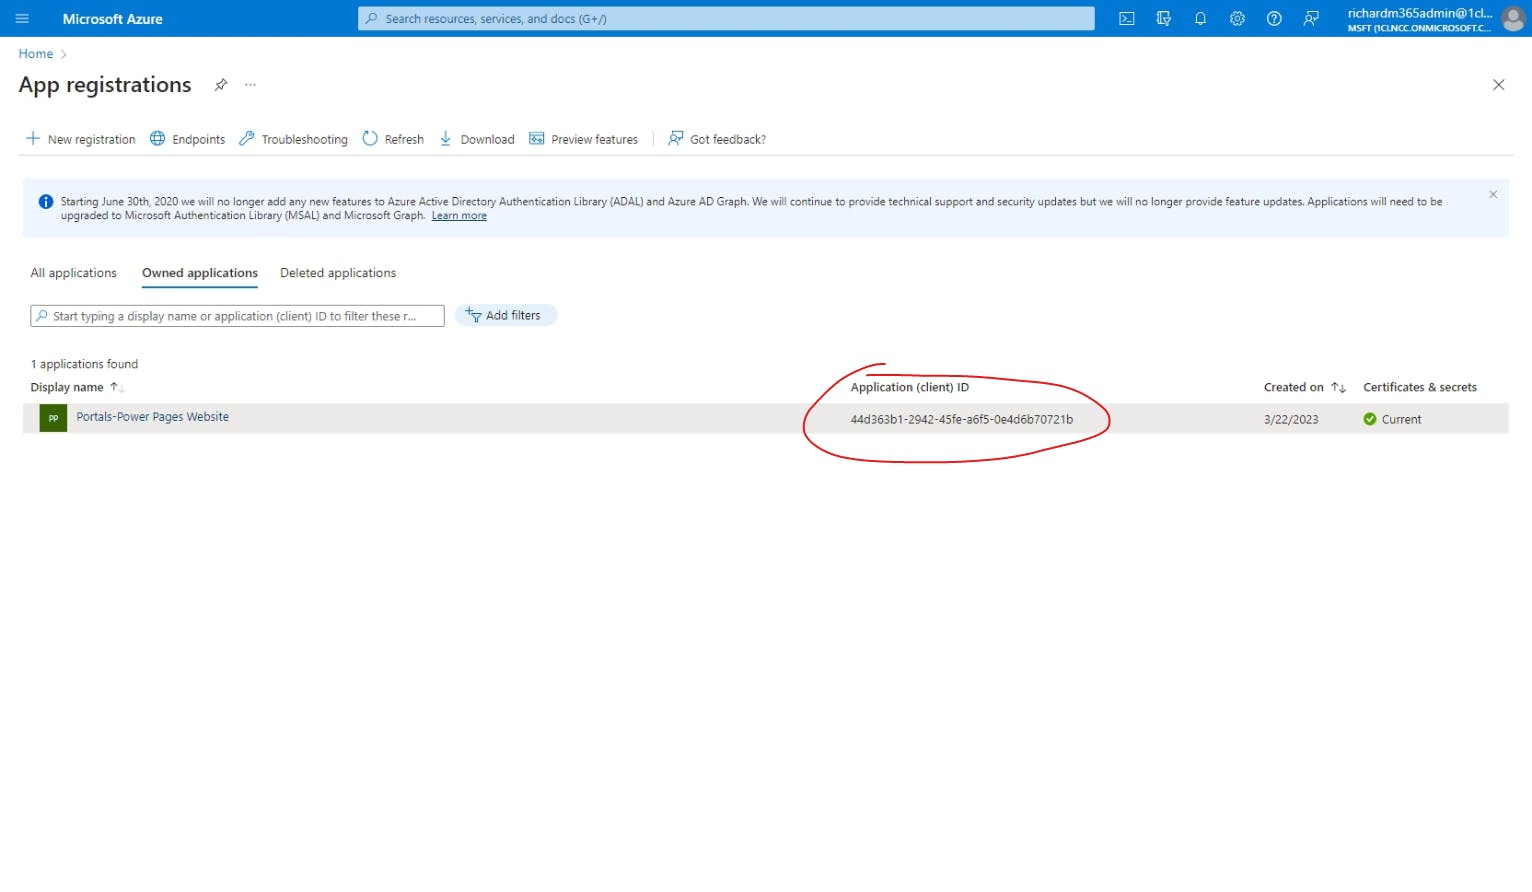
Now that you're looking at the app registrations for your organization, you should see one under Owned applications with the name "Portals-[your power pages website]". This is the app registration that was created by default. To confirm this, let's find compare the Application (client) ID listed next to it against the one mentioned in Power Pages.
To find the application ID through Power Pages:
Go back to the previous browser tab with the Power Pages site editor (where you started configuring the Microsoft identity provider) and close the Configure identity provider flyout menu.
In the Set up menu, go to the Site details.
In the Site details card, you should see the Application ID listed at the bottom-right.
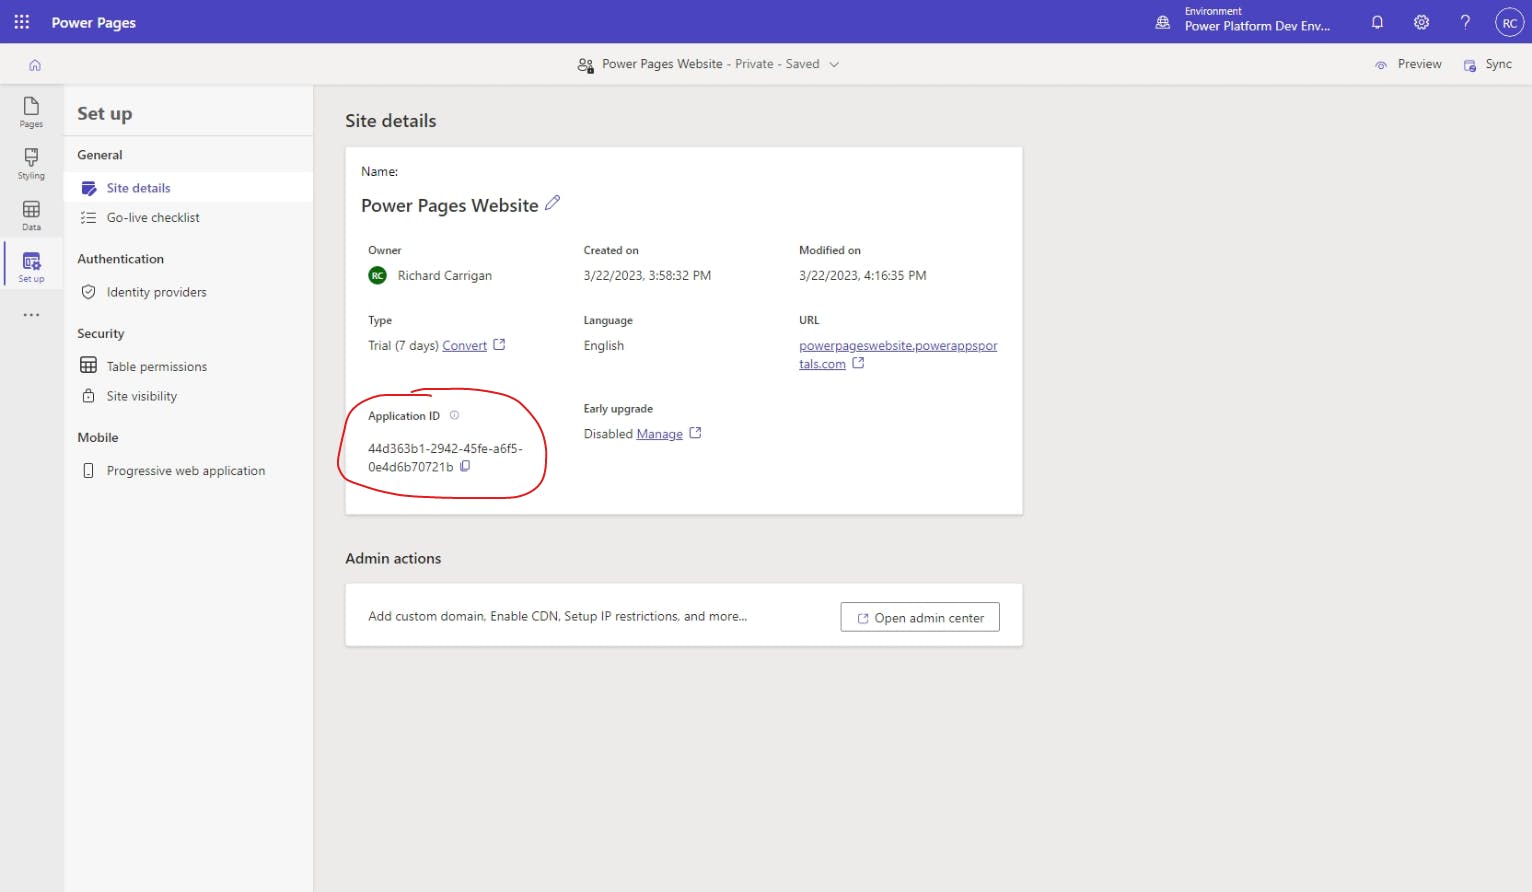
Now that you've found the Application ID associated with the Power Pages website, go back to the Azure app registrations tab, and you'll see that this value matches the Application (client) ID for the app registration.
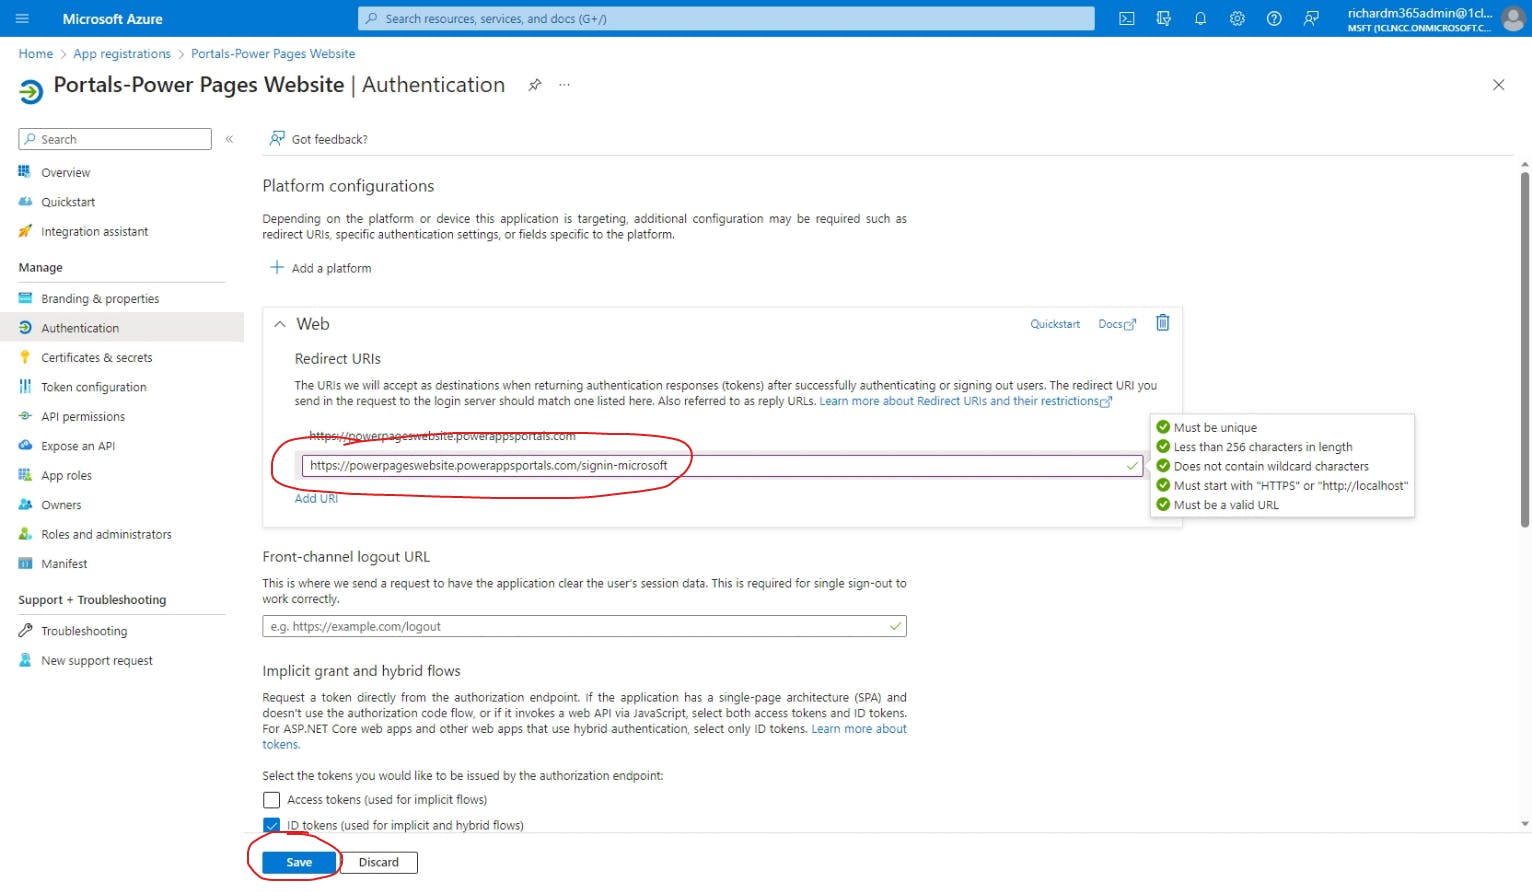
Great! We're now confident that this is the app registration associated with our Power Pages website, so let's select it and start making the necessary configuration changes. First, let's go back into the Power Pages website editor tab, go back to Identity providers, hit ⚙ Configure next to the Microsoft provider again, hit Next, and then copy the Reply URL.

With the Reply URL in hand, go back to the Azure app registrations tab, select the app registration associated with your Power Pages website, and then go to Authentication. In the Authentication screen, select Add URI, paste the Reply URL into the space provided, and then hit Save at the bottom of the screen.
Outstanding! Now we've "told" our Azure app registration that Microsoft authentication requests from our Power Pages website are allowed. Next, we need to create a new secret so that the authentication process will be secure.
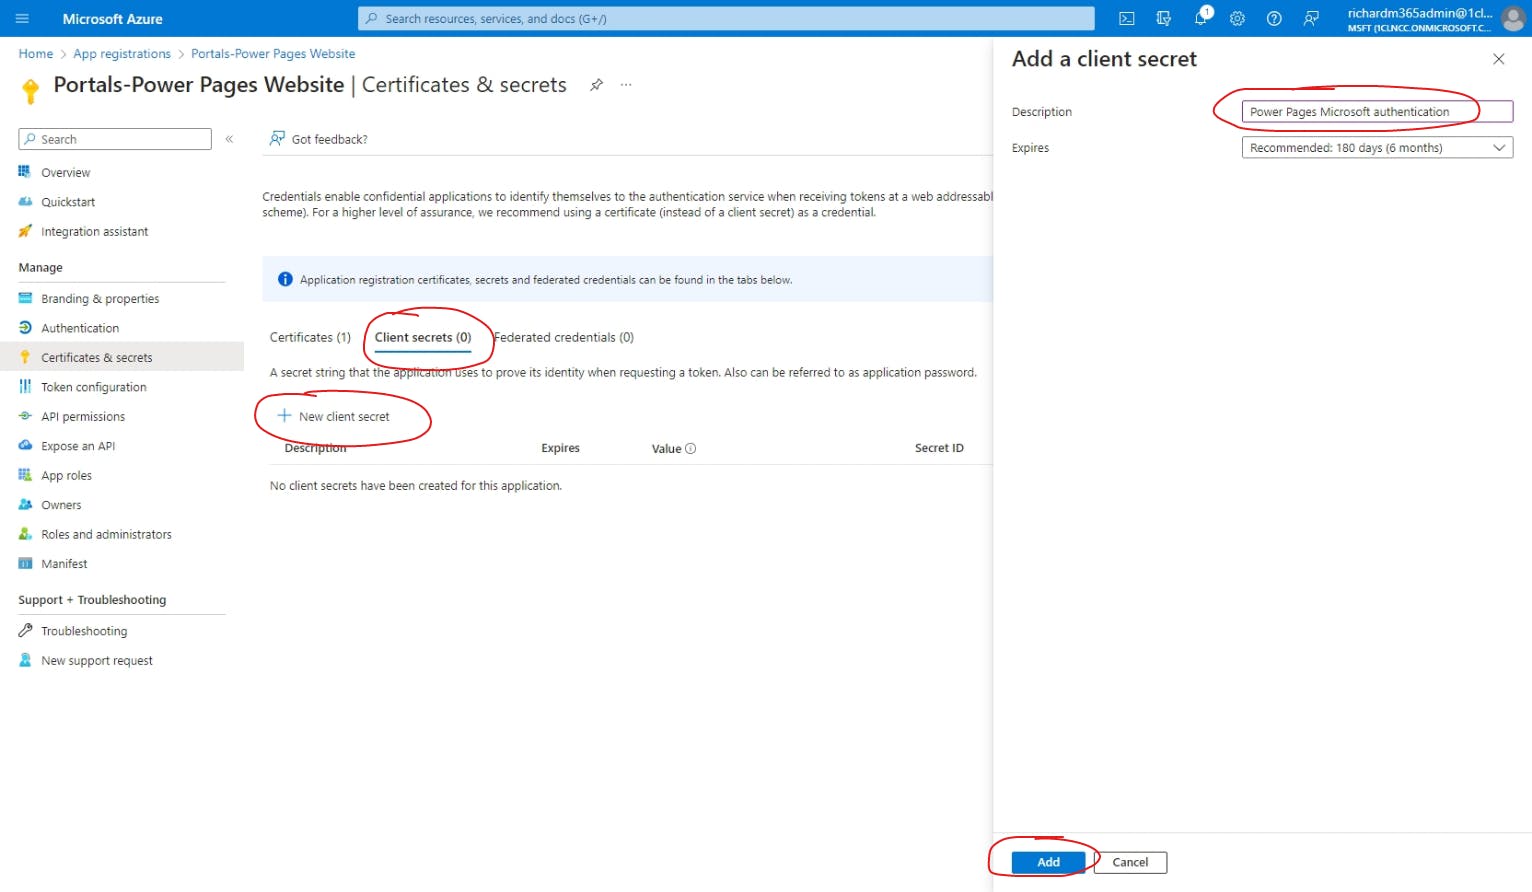
To create a new client secret within Azure app registration:
Go to the Certificates & secrets screen and select the Client secrets tab.
Hit + New client secret.
Add a Description so everyone knows where this secret is being used (e.g. "Power Pages Microsoft authentication") and then hit Add.
Once the new secret has been created, make sure to copy the Value, as it will only be displayed this one time. If you fail to copy it or lose it later, you'll need to create a new one.
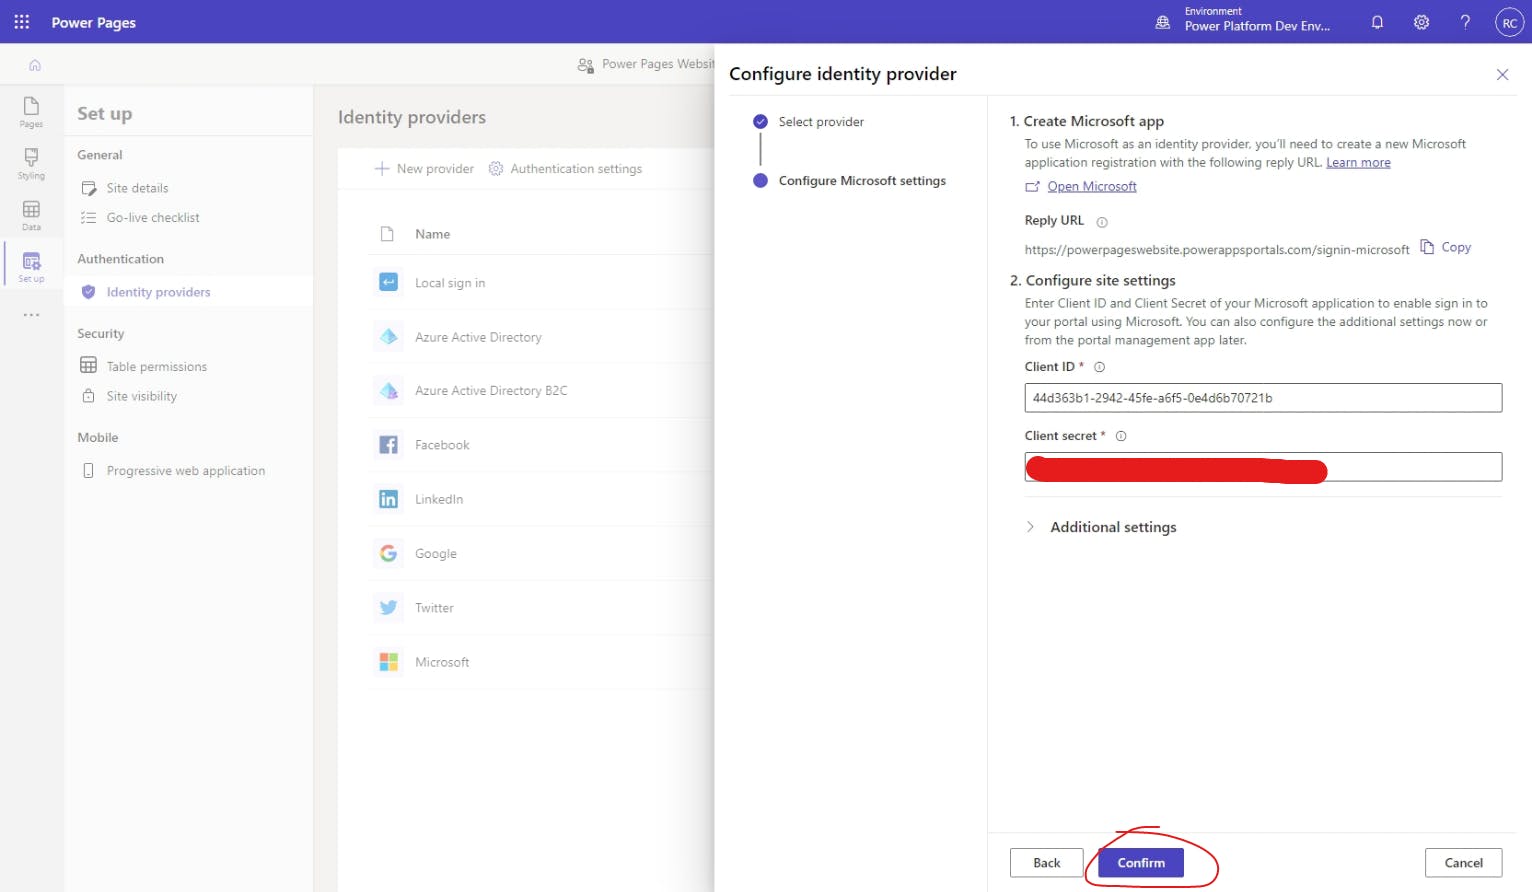
With the client secret Value copied, let's go back to our Power Pages editor tab and paste it into the Client secret field. We also need the Client ID, so let's go get that next.
To get the client ID from Azure app registrations, simply go to the Overview screen and copy the Application (client) ID value.
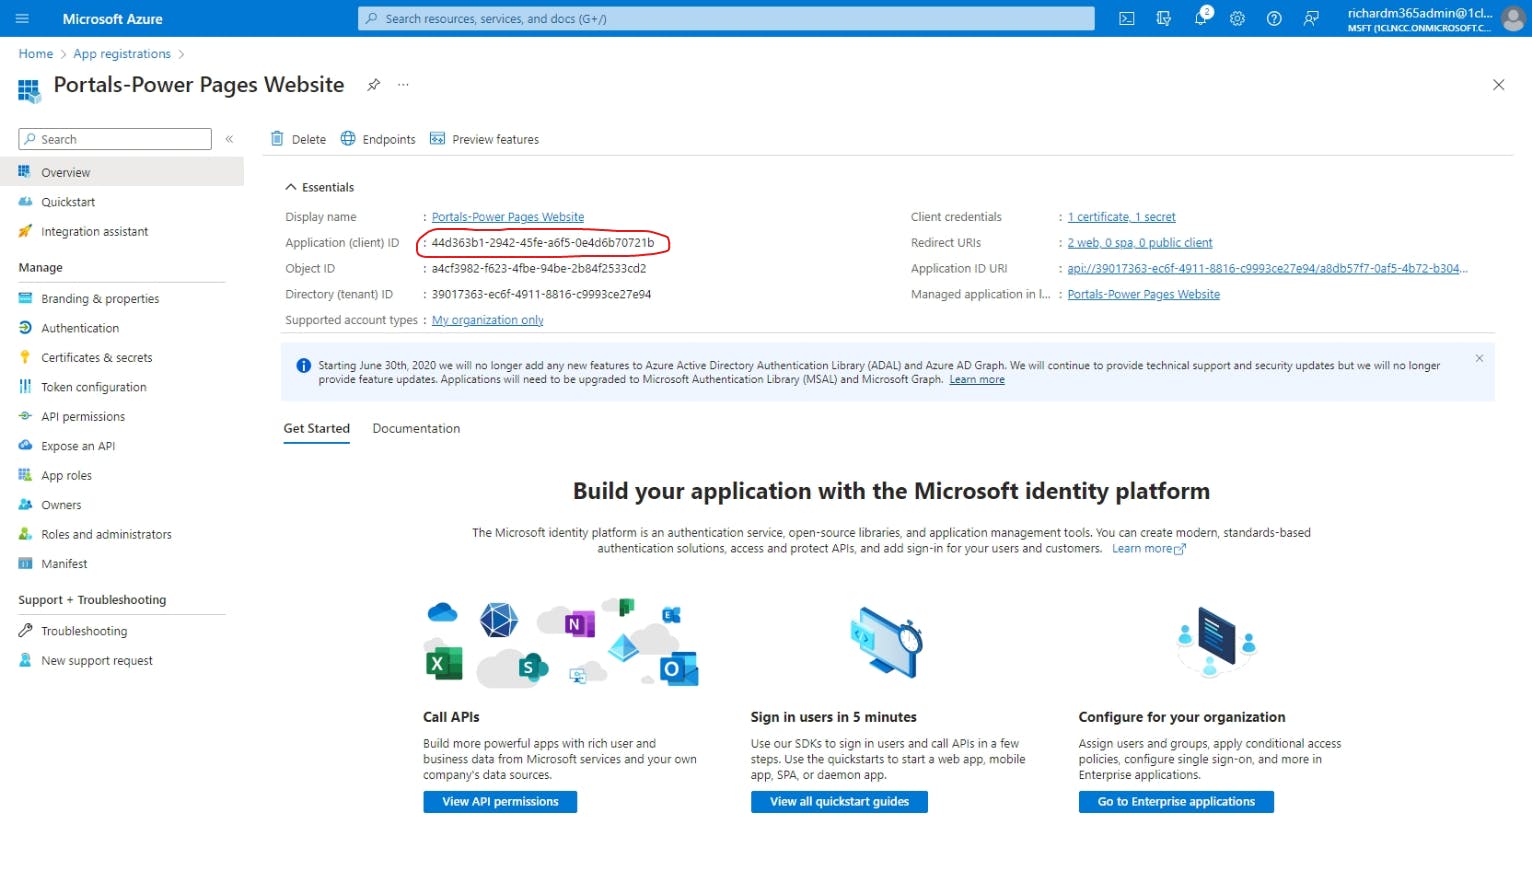
Now go back to the Power Pages editor and paste this into the Client ID field.
(Optional) Change audience type
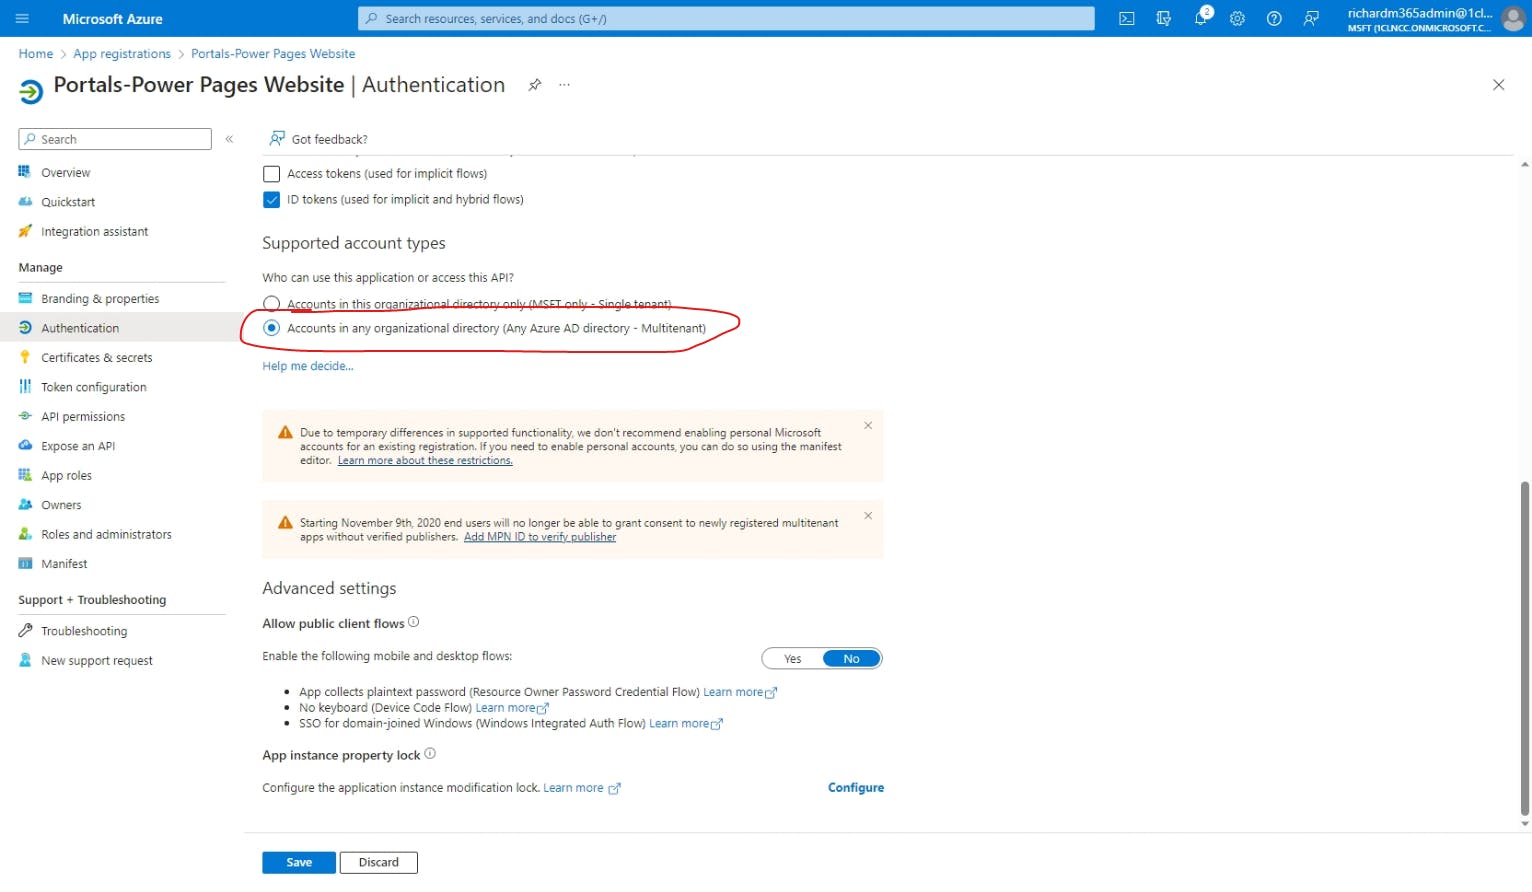
Depending on the intended audience, or user type, for your Power Pages website, you may need to change the audience type within the Azure app registration so that the intended users can log in as expected. By default, only users within your organization are allowed to authenticate with this method, but you can change this to allow any work/school accounts, or any Microsoft account (work/school or personal). If the Power Pages website is a company intranet, for example, you would want to leave it set to the default. However, if you're building a B2B website, then you'll probably want to allow all work/school accounts. Furthermore, if you're building a public-facing website, then you'll also want to allow personal accounts.
To change the audience type to allow other organization accounts, you can simply choose Accounts in any organizational directory (Any Azure AD directory - Multitenant) on the Authentication screen, like so:
However, as you may have already read in the on-screen warning message, it's not as simple for enabling personal Microsoft accounts. Instead, we need to open the Manifest from the side menu, and make the following changes:
Change accessTokenAcceptedVersion from null to 2.
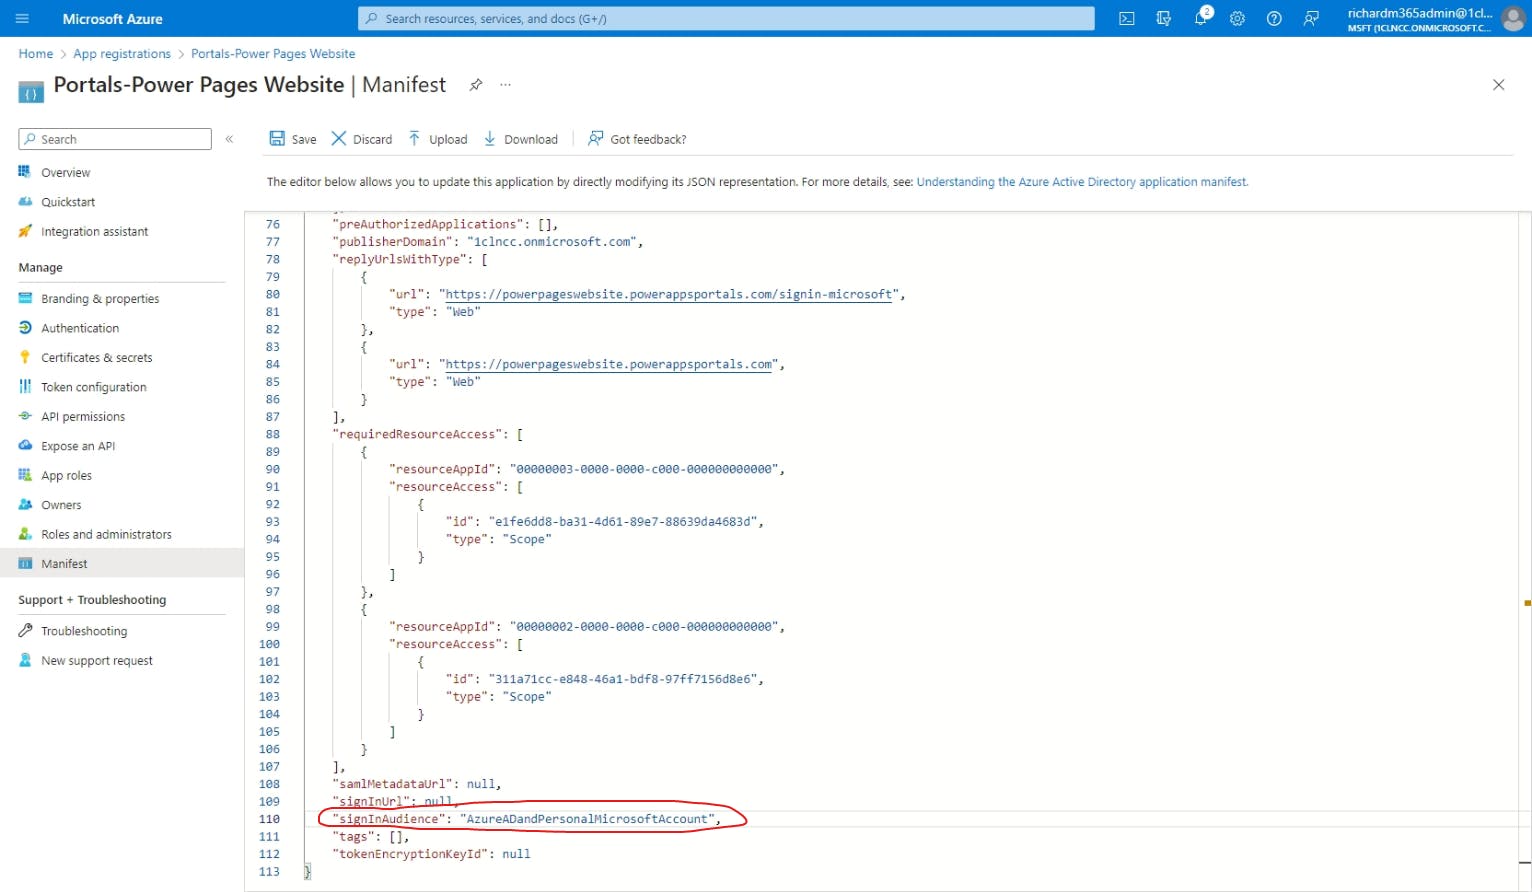
Change signInAudience from AzureADMyOrg to AzureADandPersonalMicrosoftAccount.
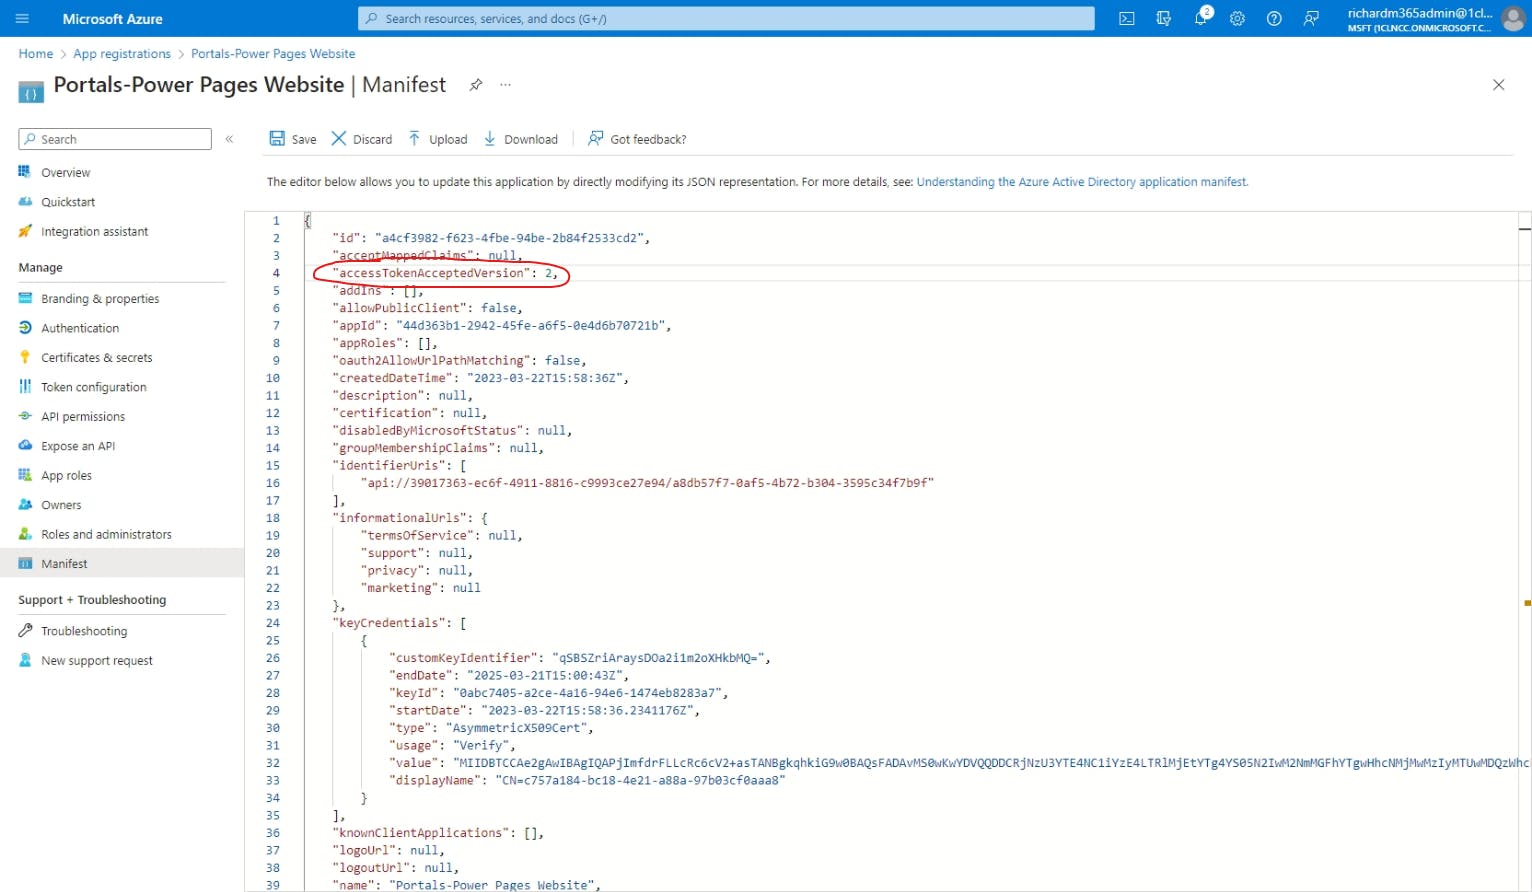
Once you're done making the necessary changes, make sure to hit Save.
Complete the configuration
Now that we have all of the necessary configuration details filled in, you can optionally go through and fill in the Additional settings if you have specific requirements for those, and then hit Confirm and then Close.
Wrap up
You did it! You've successfully configured Microsoft authentication for your Power Pages website. To verify this and test it out, let's go back to the sign-in page of your Power Pages website at your custom domain name or [your-power-pages-website].powerappsportals.com/signin and you'll now see a Microsoft option next to Azure AD:
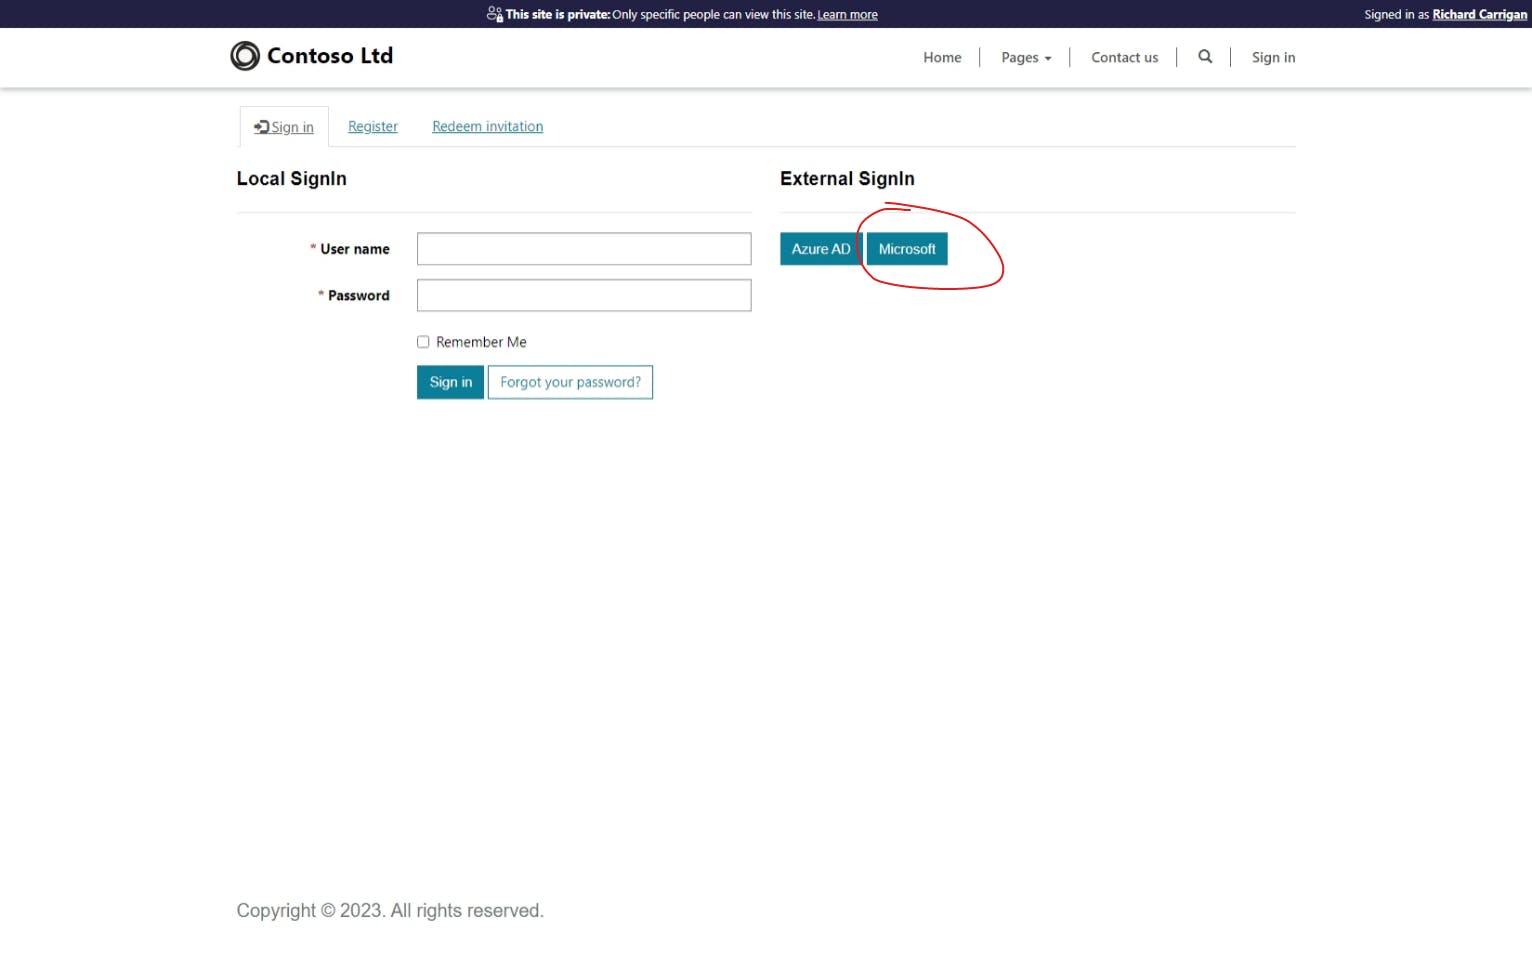
If you click on this, you'll now have the option to sign in with your Microsoft account (personal or work/school, depending on the audience type configured).
Thanks for reading and, if you found this article useful, please consider sharing it across your network so others may be able to benefit from this information.
Take care!