

Using source control with Azure DevOps and Microsoft Power Platform


Source, or version, control is a fundamental component of modern software development. Regardless of what your technology stack looks like, it is necessary to track changes, match versions with releases, and revert to a previous version in case of accidental deployment of bugs or breaking changes if necessary. In this tutorial, we'll see how we can apply this to our Power Platform environment using solutions.
What are Power Platform solutions?
Simply put, a Power Platform solution is a container for grouping together related Power Platform components, such as Power Apps, Power Automate flows, Dataverse tables, and so on, so they always move together when deploying from one environment to another. To make this more concrete, let's create a simple Canvas Power App that displays a list of contacts.
Create a new solution
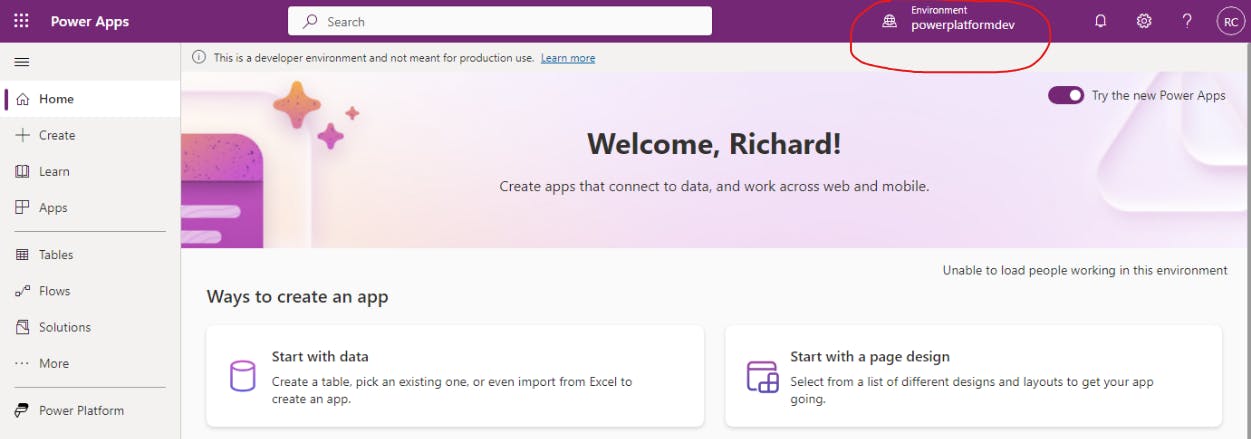
First, let's go to make.powerapps.com. Once you're there, make sure that you have the right environment selected in the top-right corner.
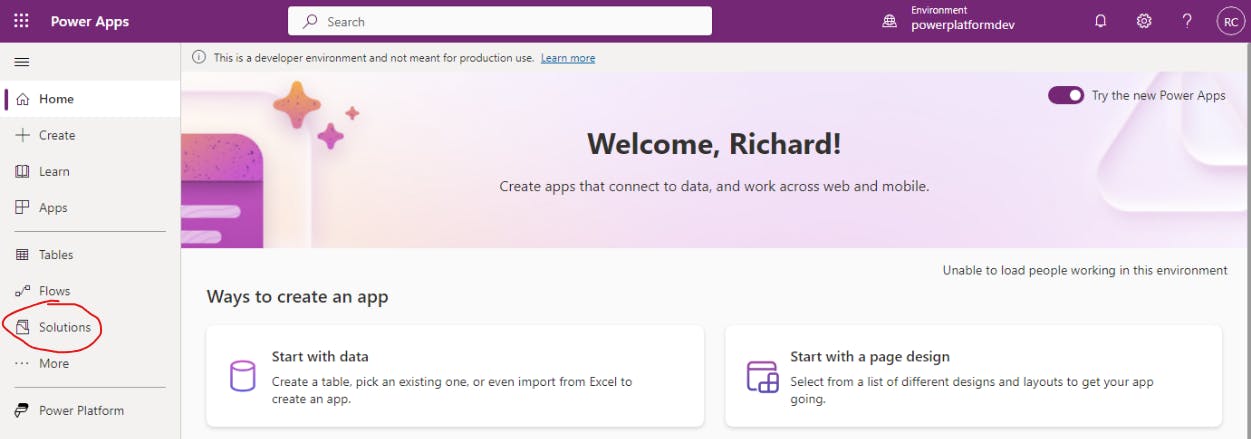
Next, let's go to Solutions so we can create a new solution to group our new canvas app and related components.
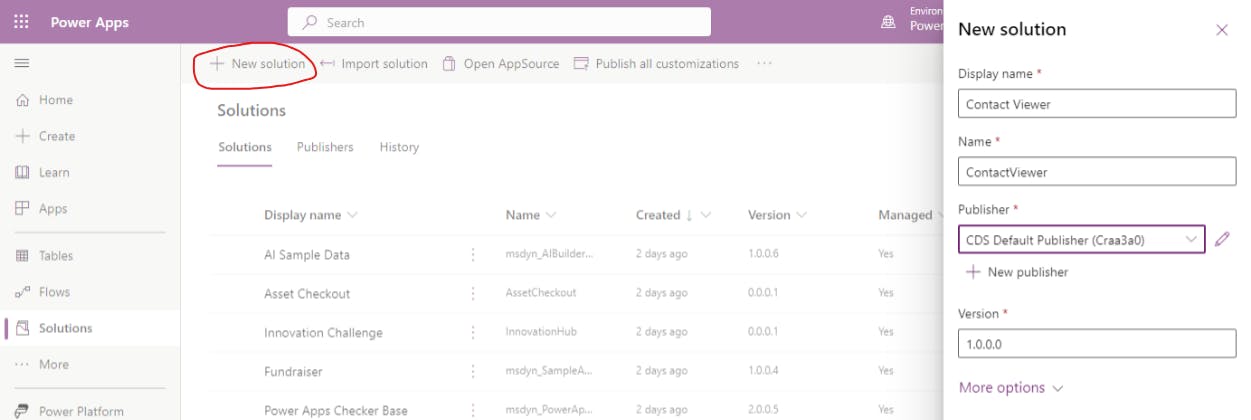
From the solutions page, select + New solution and then fill in the Display name, Publisher (default is fine), and then hit Create.
Add new Canvas Power App
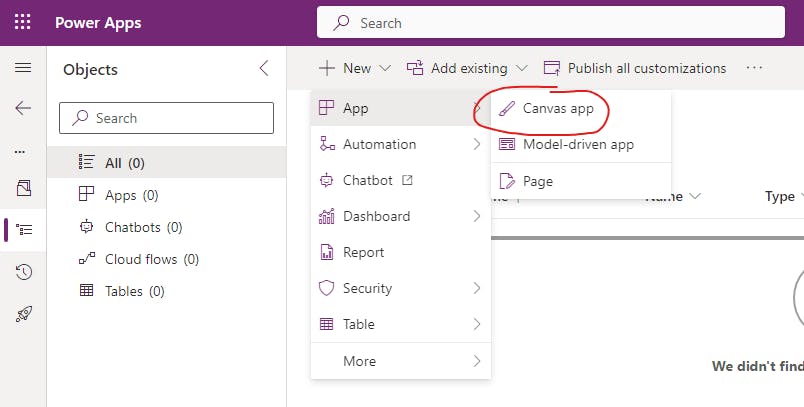
Great! Now we have a Power Platform solution to put all of our components in, so let's start building. First, let's create a new canvas Power App. To do this, select the dropdown menu next to + New, then choose App, and then choose Canvas app.
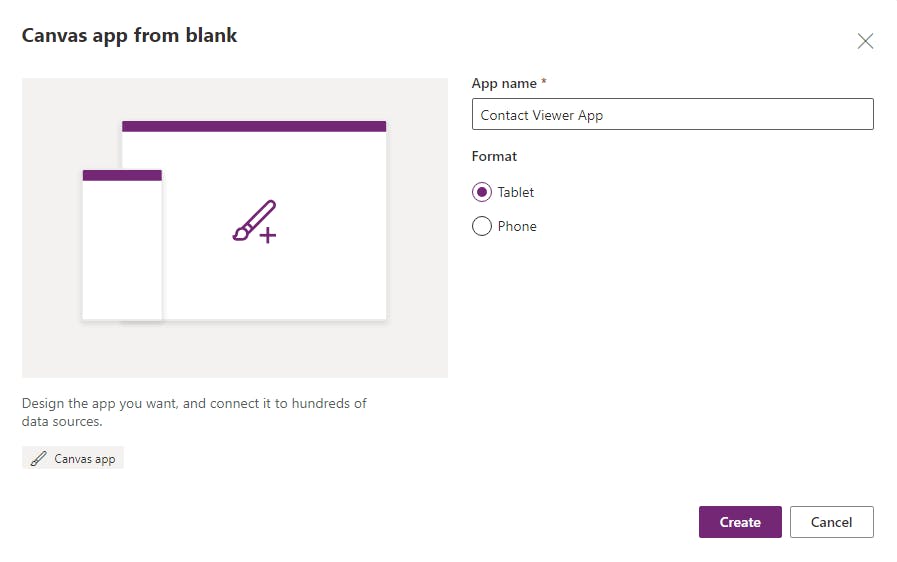
In the dialog box that comes up, give your new app a name, such as Contact Viewer App and then choose Create.
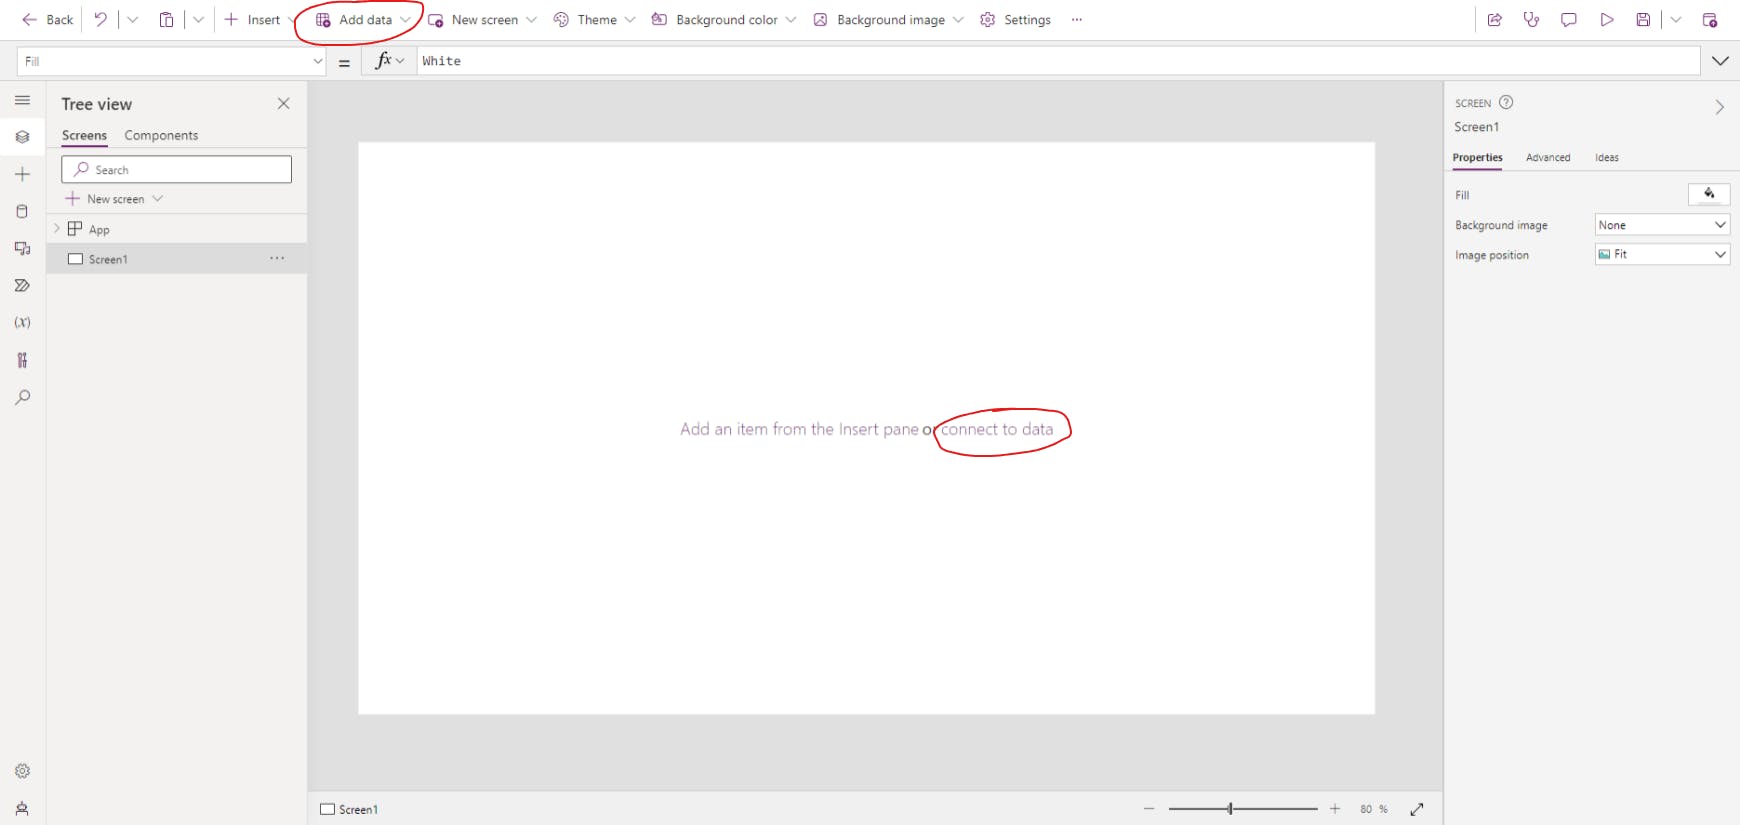
With our new canvas app created, let's connect it to the Contacts table to display a list of the contacts in our database. To do this, choose connect to data on the canvas, or select Add data from the top menu.
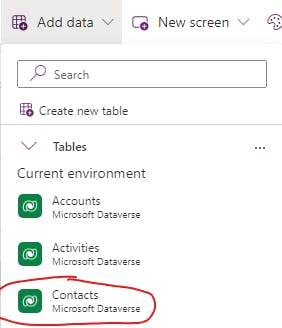
Once the list of tables opens, select Contacts.
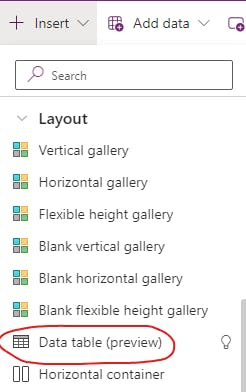
With our Contacts table added, now let's choose Insert and select the Data table (preview) option from within the Layout category.
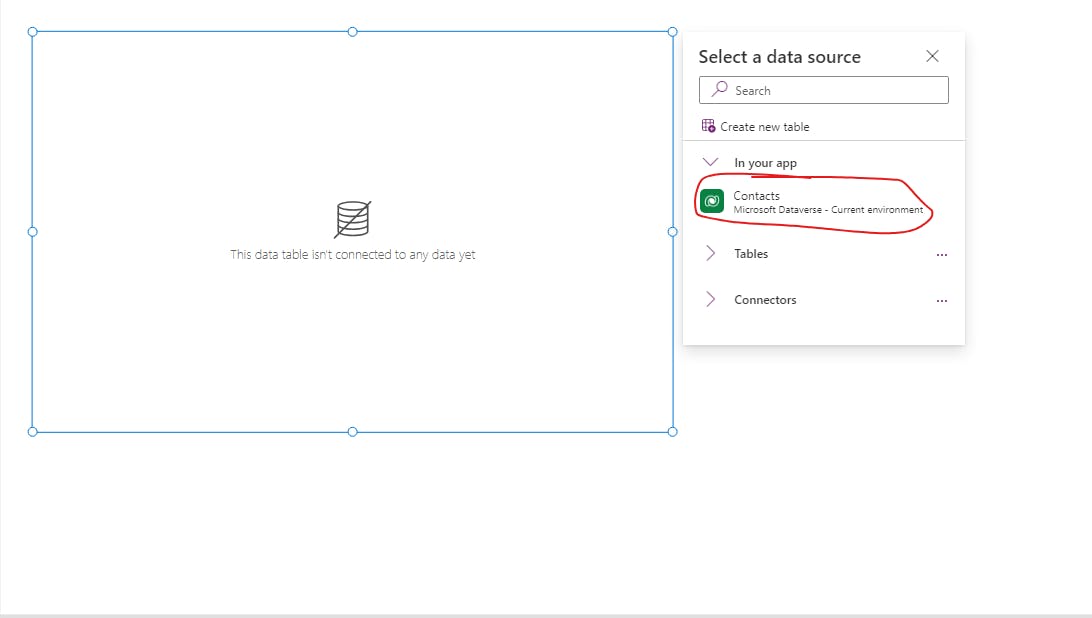
Once the data table gets added to our canvas, choose the Contacts table.
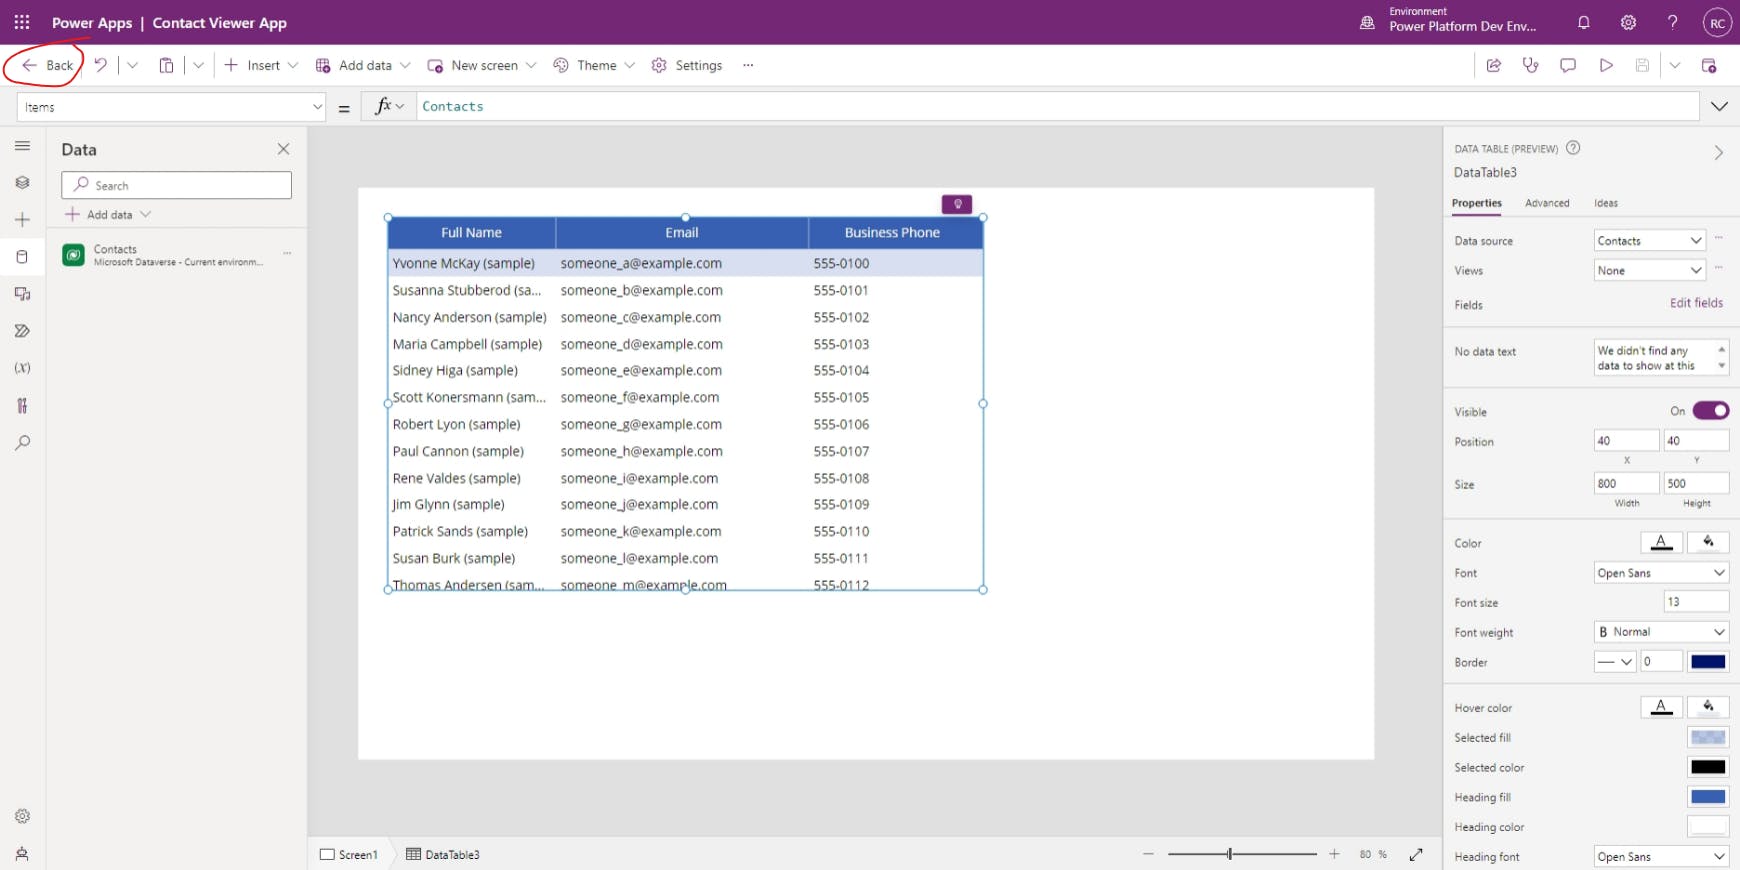
You should now have a data table with a list of contacts. With that, our simple canvas app is finished, so let's hit Publish in the top-right corner.

Once the app finishes publishing, hit Back to get back to our solution.
Adding related components
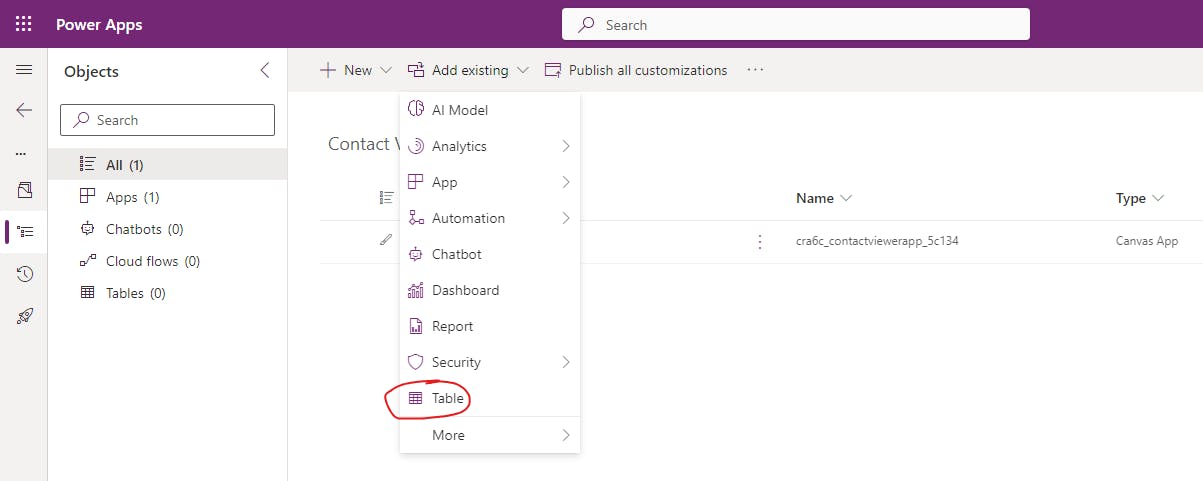
You should now see your newly-created canvas app listed as the only component within our solution. However, we know that our solution depends on the the Contacts table from the Dataverse, so let's add that as another component in our solution.
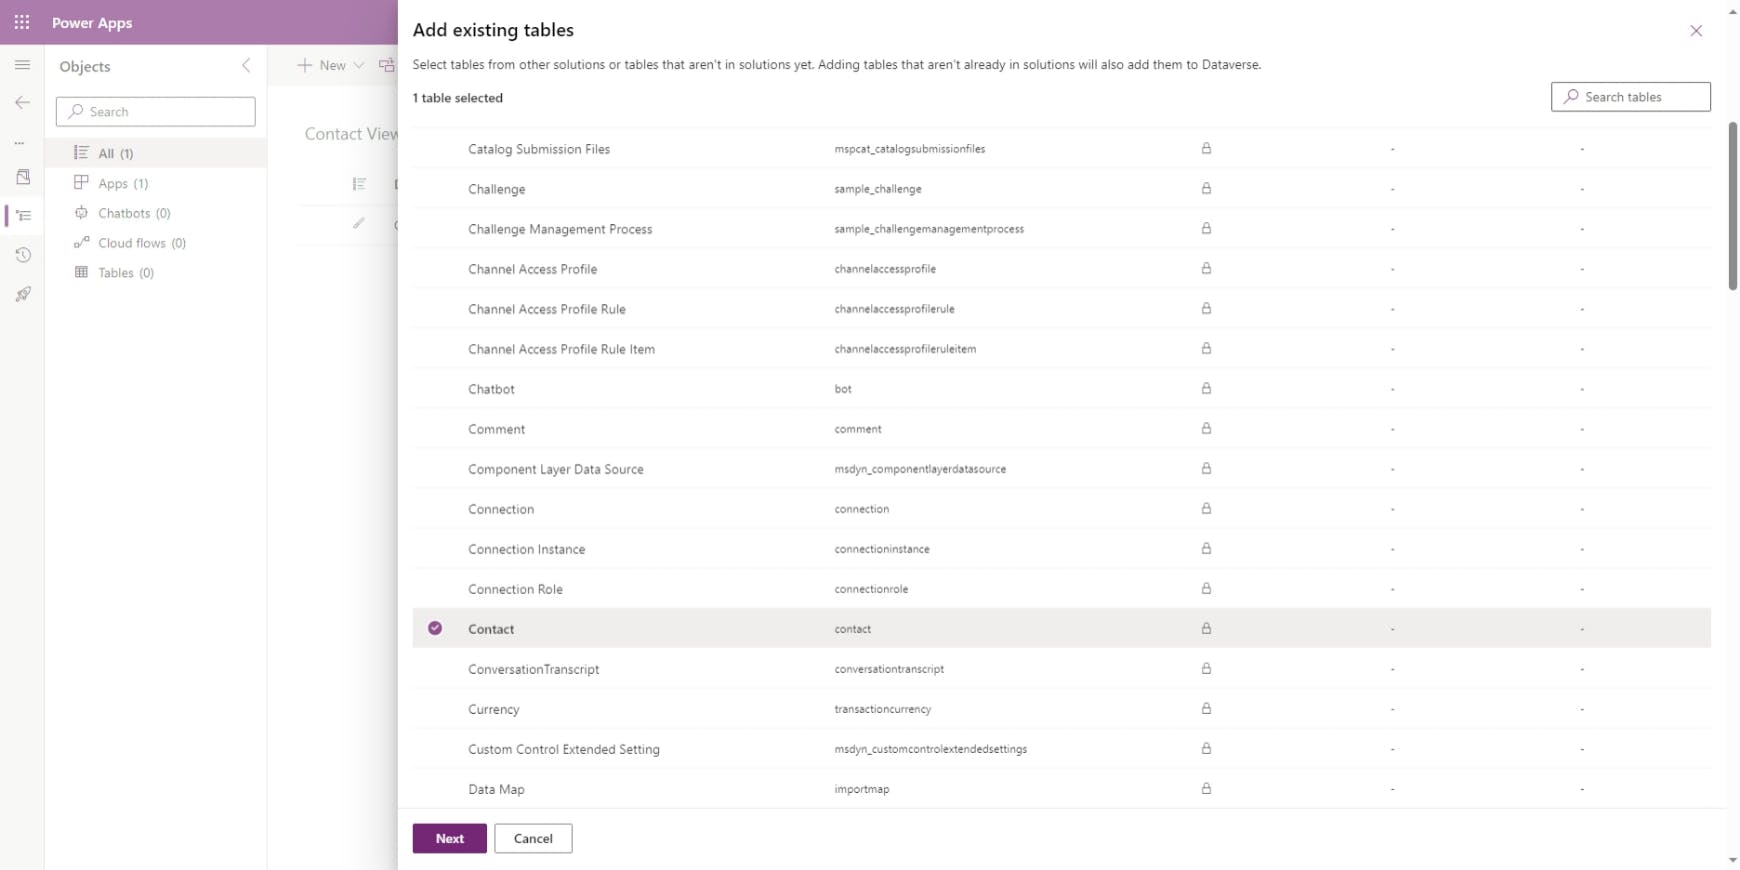
To do this, select Add existing, and then choose Table.
From the Add existing tables menu, choose the Contact table and hit Next.
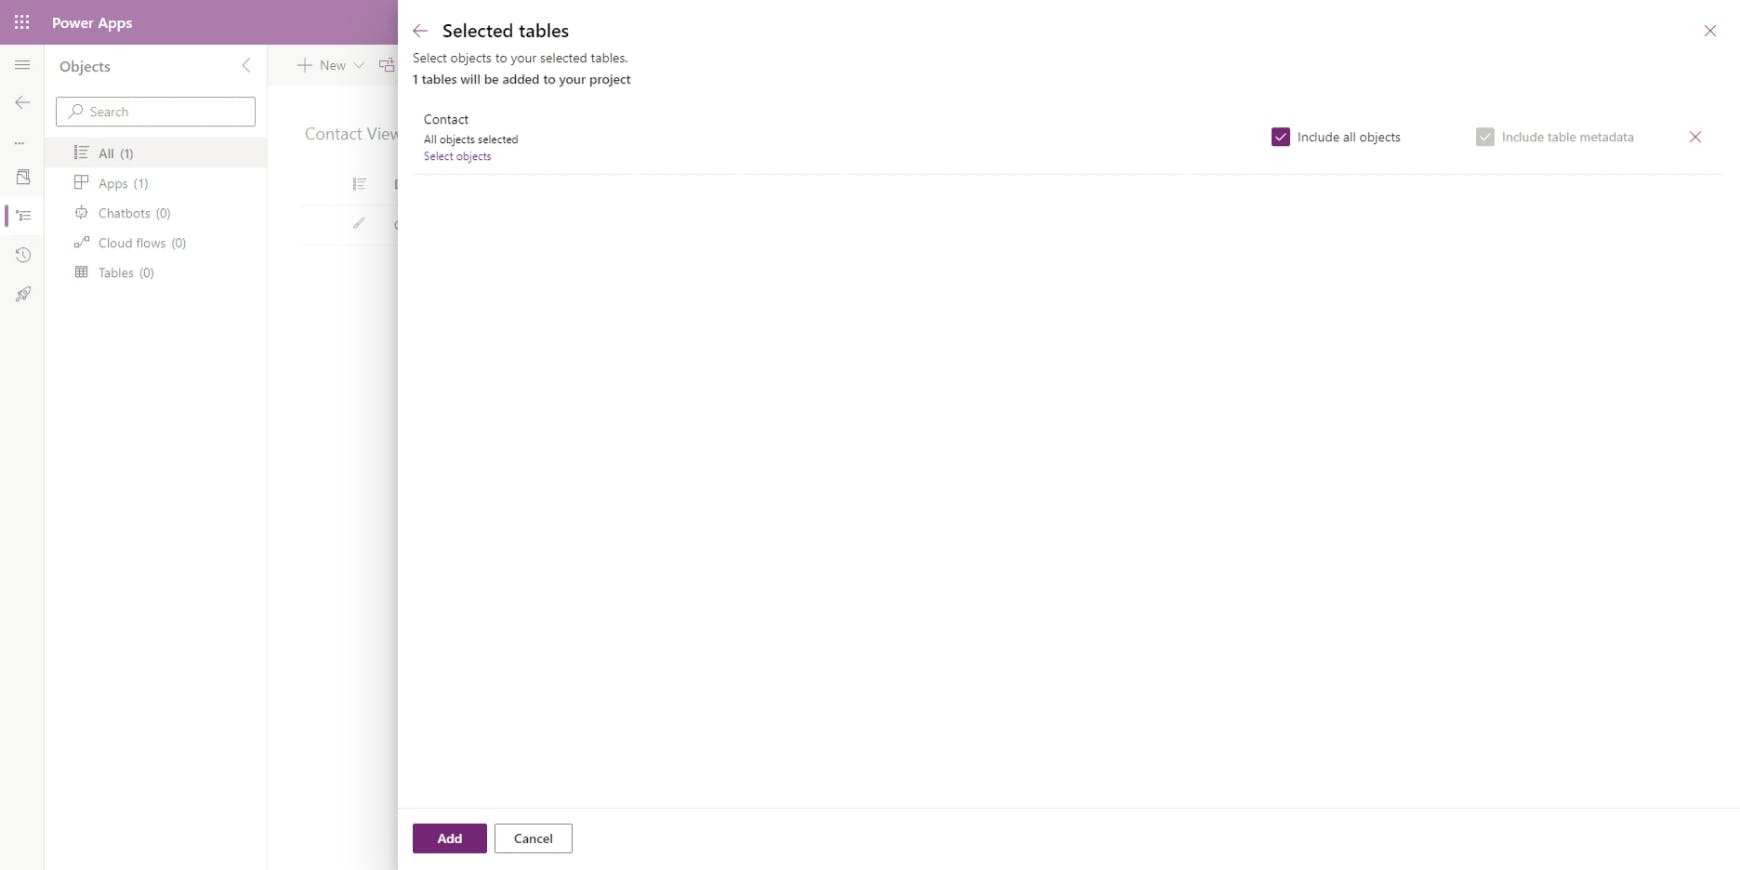
From here, we could specify exactly which objects (columns, relationships, keys, etc.) to include, but we would then have to make sure this gets updated any time we update the canvas app to include other objects, so I recommend selecting Include all objects. With that selected, hit Add.
We now have a Power Platform solution that contains our newly-created canvas app, as well as the Dataverse table that it depends upon. Next, let's explore how to add this solution to source control.
Azure DevOps setup
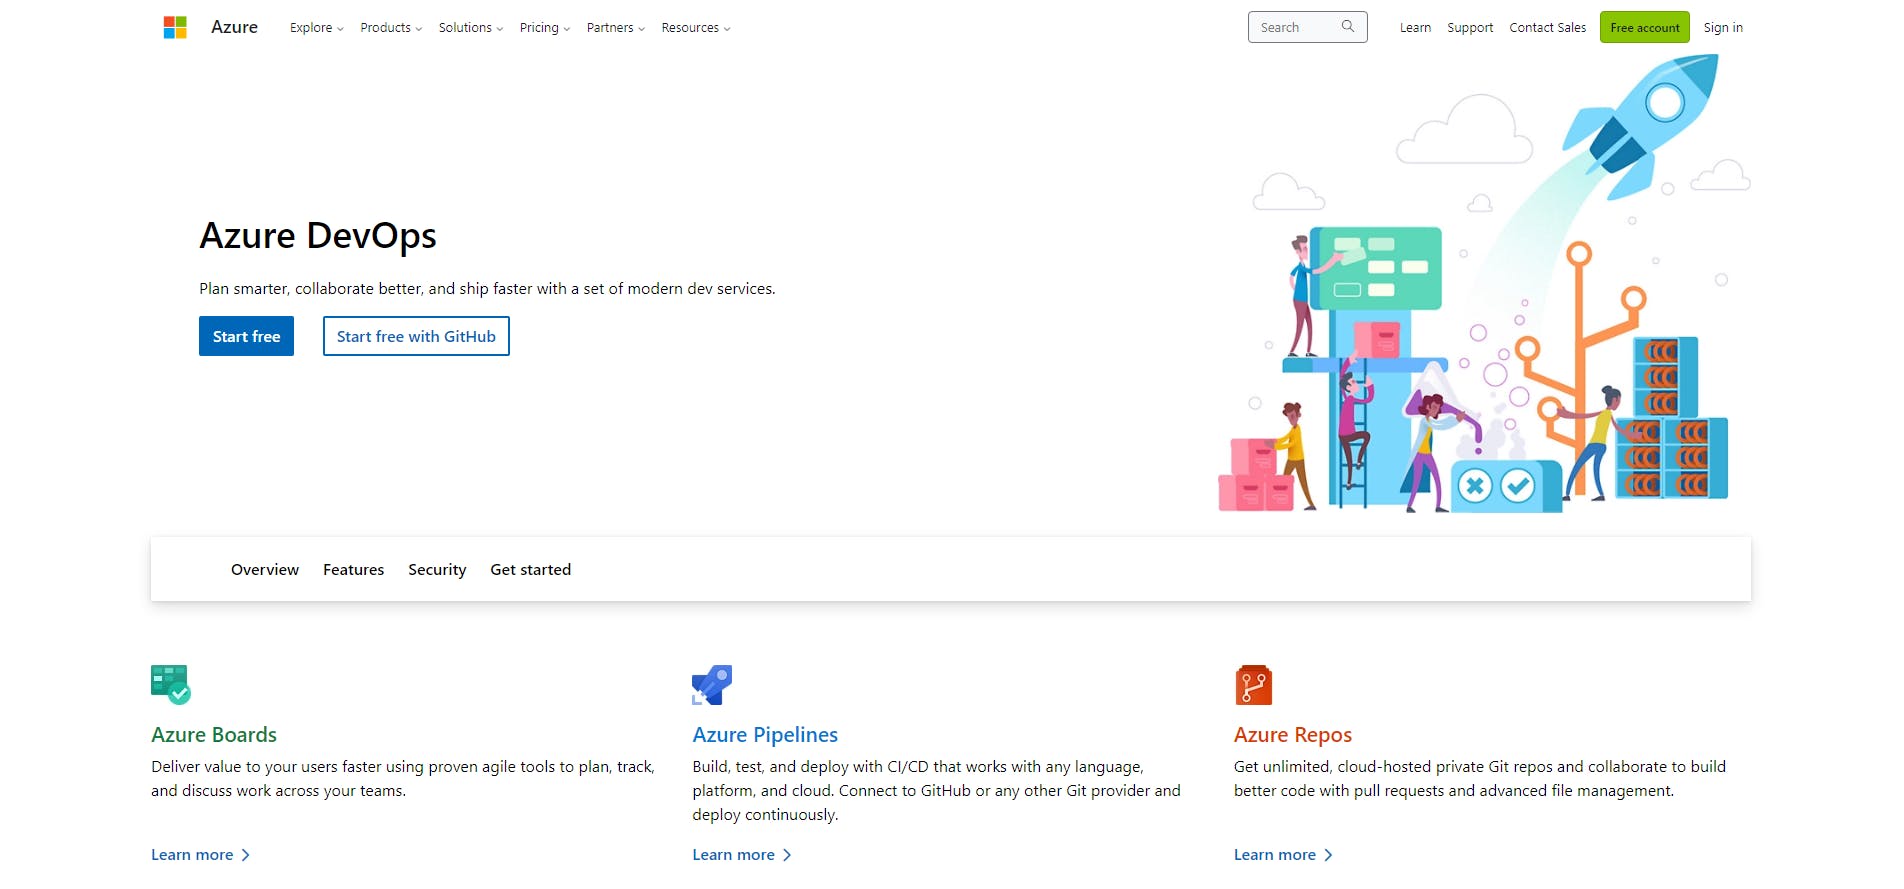
Now that we have our solution, we need to set up our Azure DevOps project so we have a place to store the files once we export them. In order to start working with Azure DevOps, we'll need an account. So go to dev.azure.com and, if you already have an Azure DevOps account, log into that. Otherwise, click Start free or Start free with GitHub, whichever you prefer.
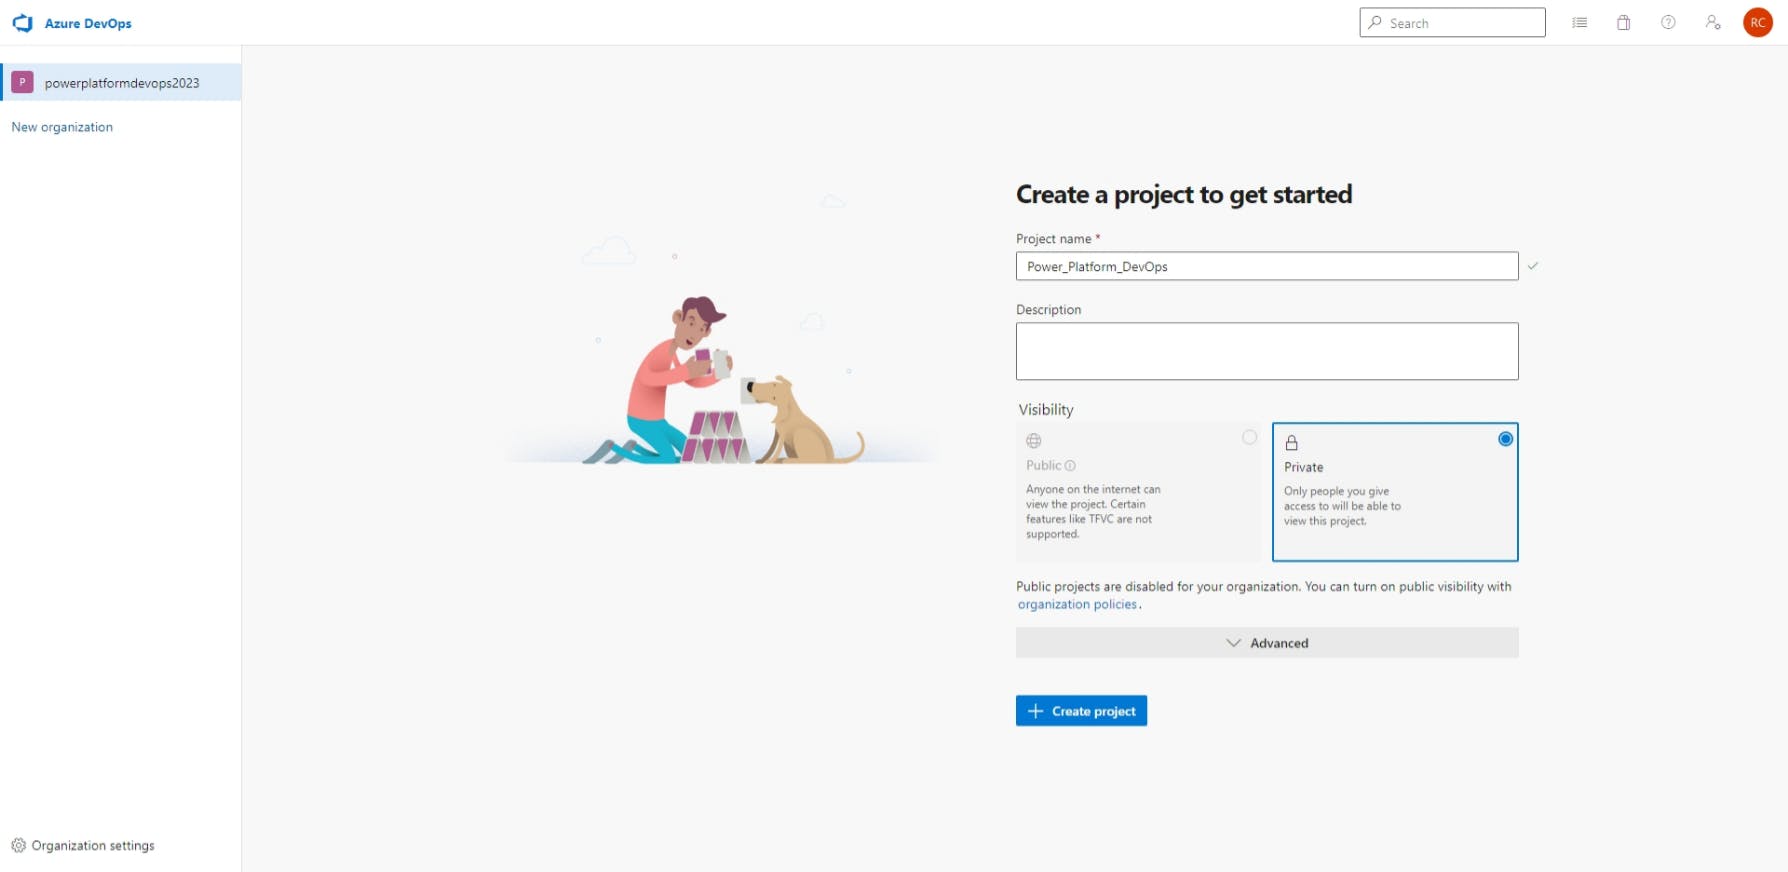
If this is a new Azure DevOps account, you'll be prompted to create a new project. If you're logging into an existing account, you'll need to select + New project in the top-right corner. Once you've reached the new project wizard, simply give your new project a name and hit + Create project. This project will be used to store all of our Power Platform environment files, so the name should reflect that. You may be given the options for version control and agile process, but the defaults are usually fine unless you know you'll need something else.
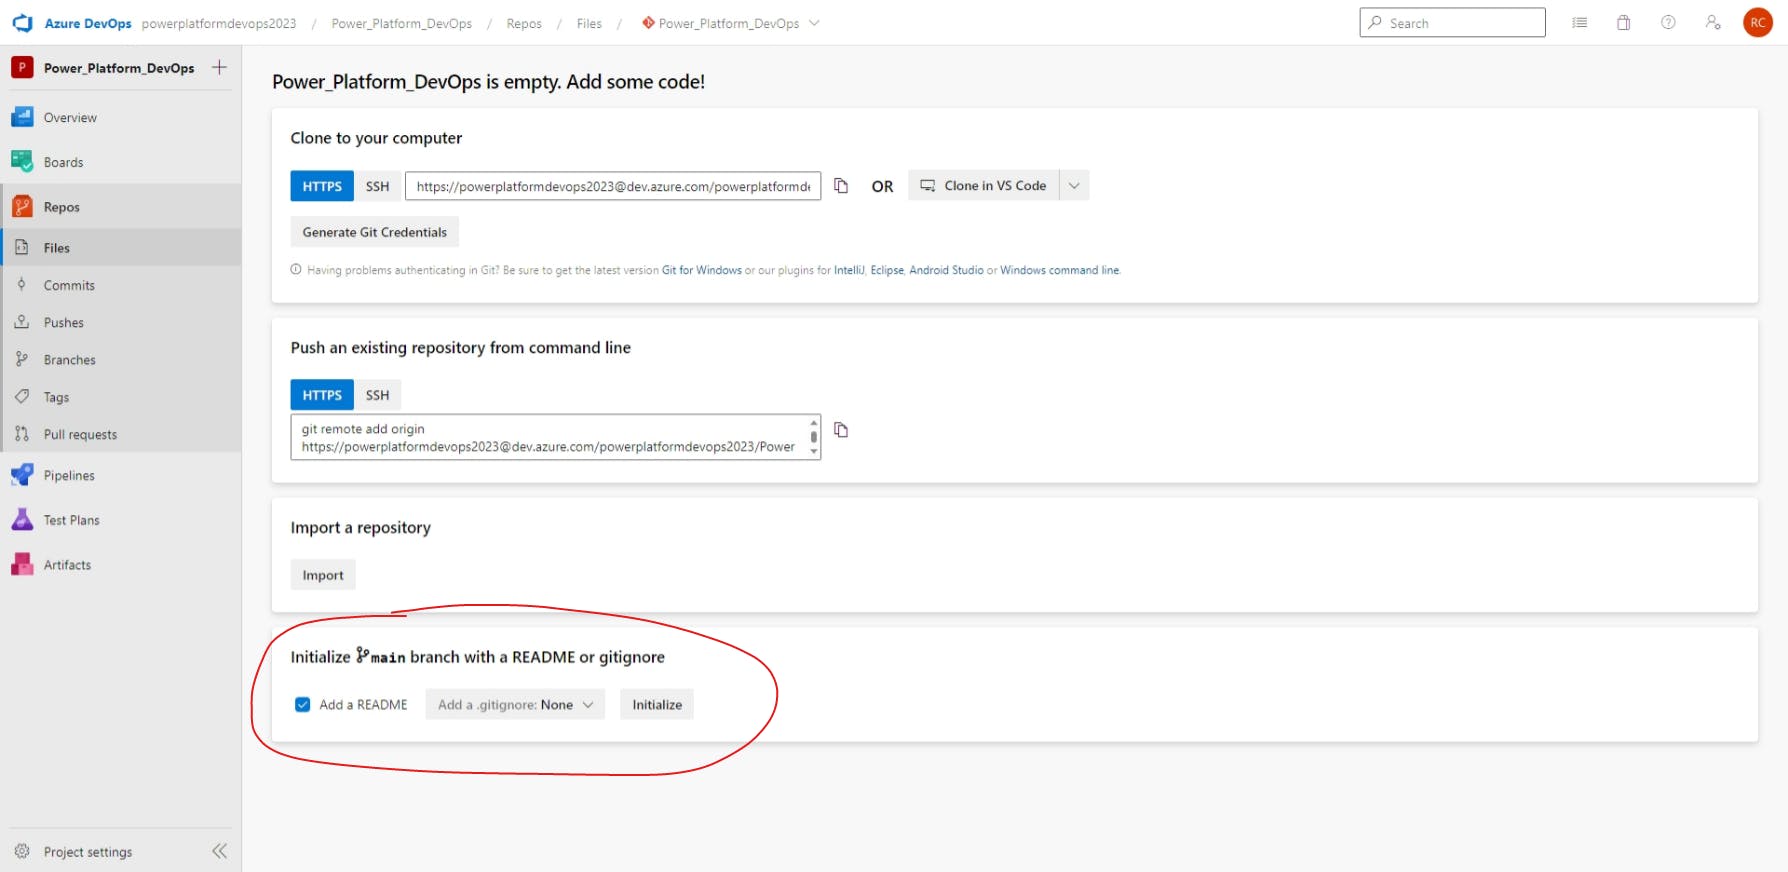
Now that we have a new Azure DevOps project, we need to create a Repo (or repository) to store our Power Pages solution. To do this, select Repos on the sidebar and then choose Initialize under the heading Initialize main branch with a README or gitignore. We'll want to have the README file, but we don't need a gitignore file for now, so the defaults are fine.
Clone the project repo to our local machine
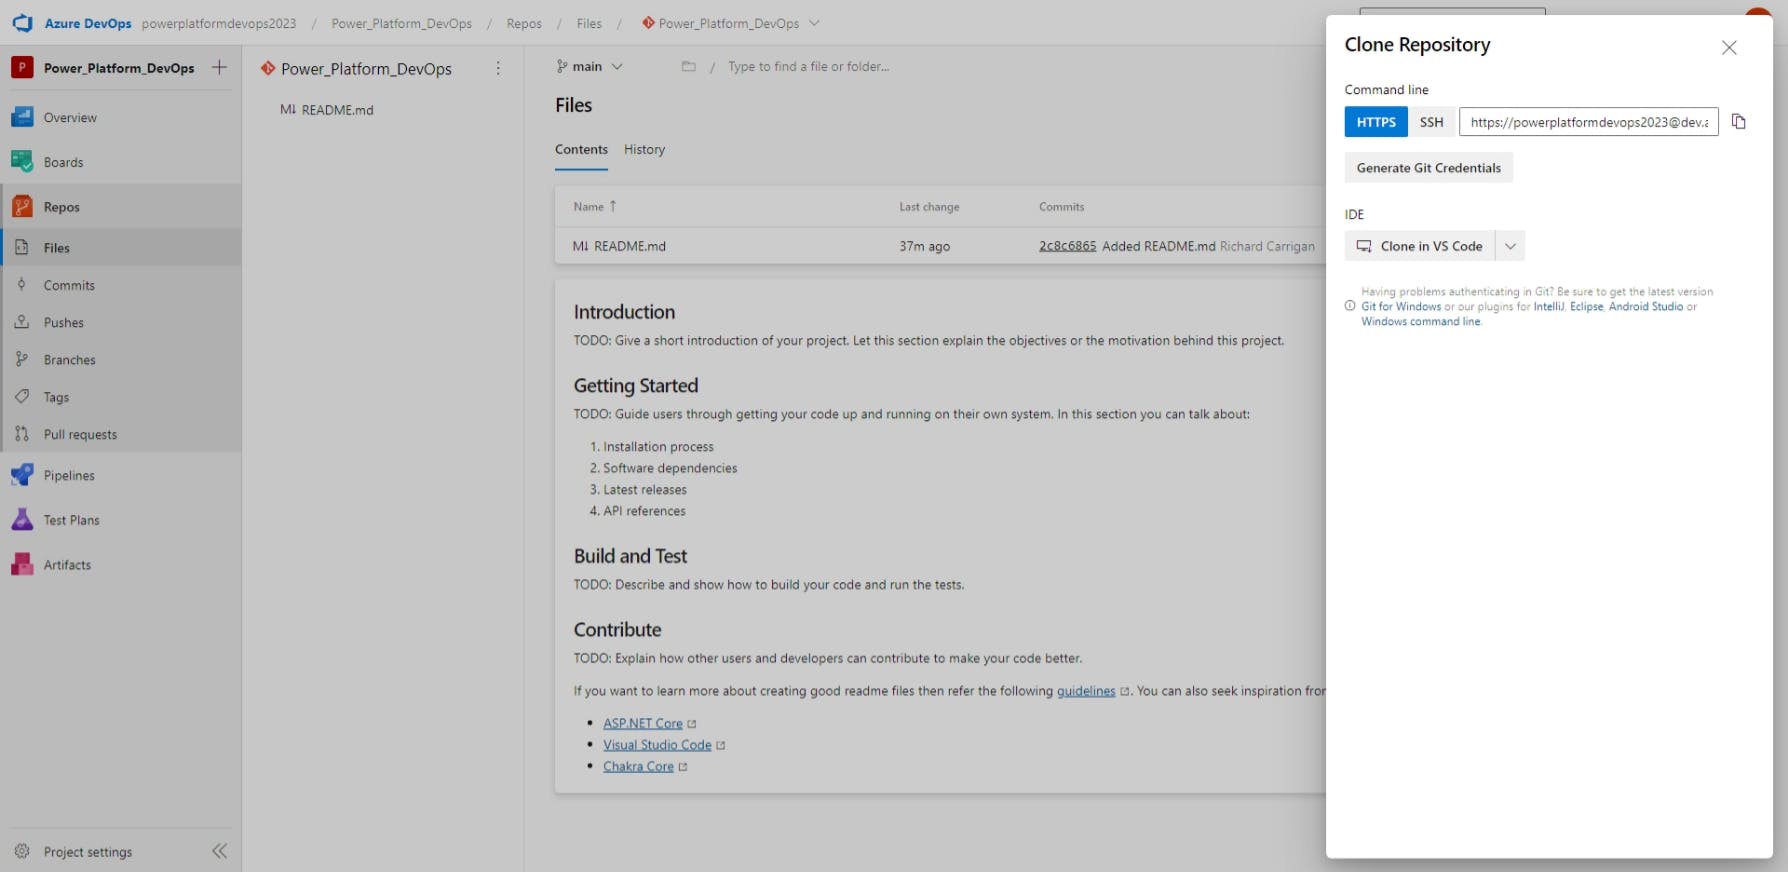
Alright, so we have our Azure DevOps project set up. Next, we need to connect a folder on our local machine to the new project. To do that, select Clone in the top-right and then copy the HTTPS URL provided. Alternatively, if you know what you're doing, you could also use SSH or the Clone in VS Code option if you already have that installed.
Back on your local machine, open a new terminal window (Git Bash, Windows Terminal, etc.) and navigate to the directory where you want your Power Pages website files stored (i.e. Documents folder) and then use git clone to copy your newly-created repo into this directory. For example:
cd ~/Documents
git clone https://powerplatformdevops2023@dev.azure.com/powerplatformdevops2023/Power%20Platform%20DevOps/_git/Power_Platform_DevOps
Once the cloning process finishes, you'll have a directory named the same as your Azure DevOps project, Power_Platform_DevOps.
Ok, so now we have a directory on our local machine containing a README file. What now? Thank you for asking 😀! Next, we need to export the Power solution, unpack it into this new directory, and then upload those files to our newly-created Azure DevOps repo.
But first, let's use the following commands to create a solutions directory to store these files in. This will make it easier for us to distinguish between the files needed for each of our Power Platform solutions and other files that are part of our Power Platform environment, such as Power Pages website content and deployment files.
cd Power_Platform_DevOps
mkdir solutions
Adding solution to source control
We now have a Power Platform solution ready to be checked into source control, and a repo ready to store the solution files. Now all that's left is to get the files from our Power Platform environment and add them to our repo.
Export solution
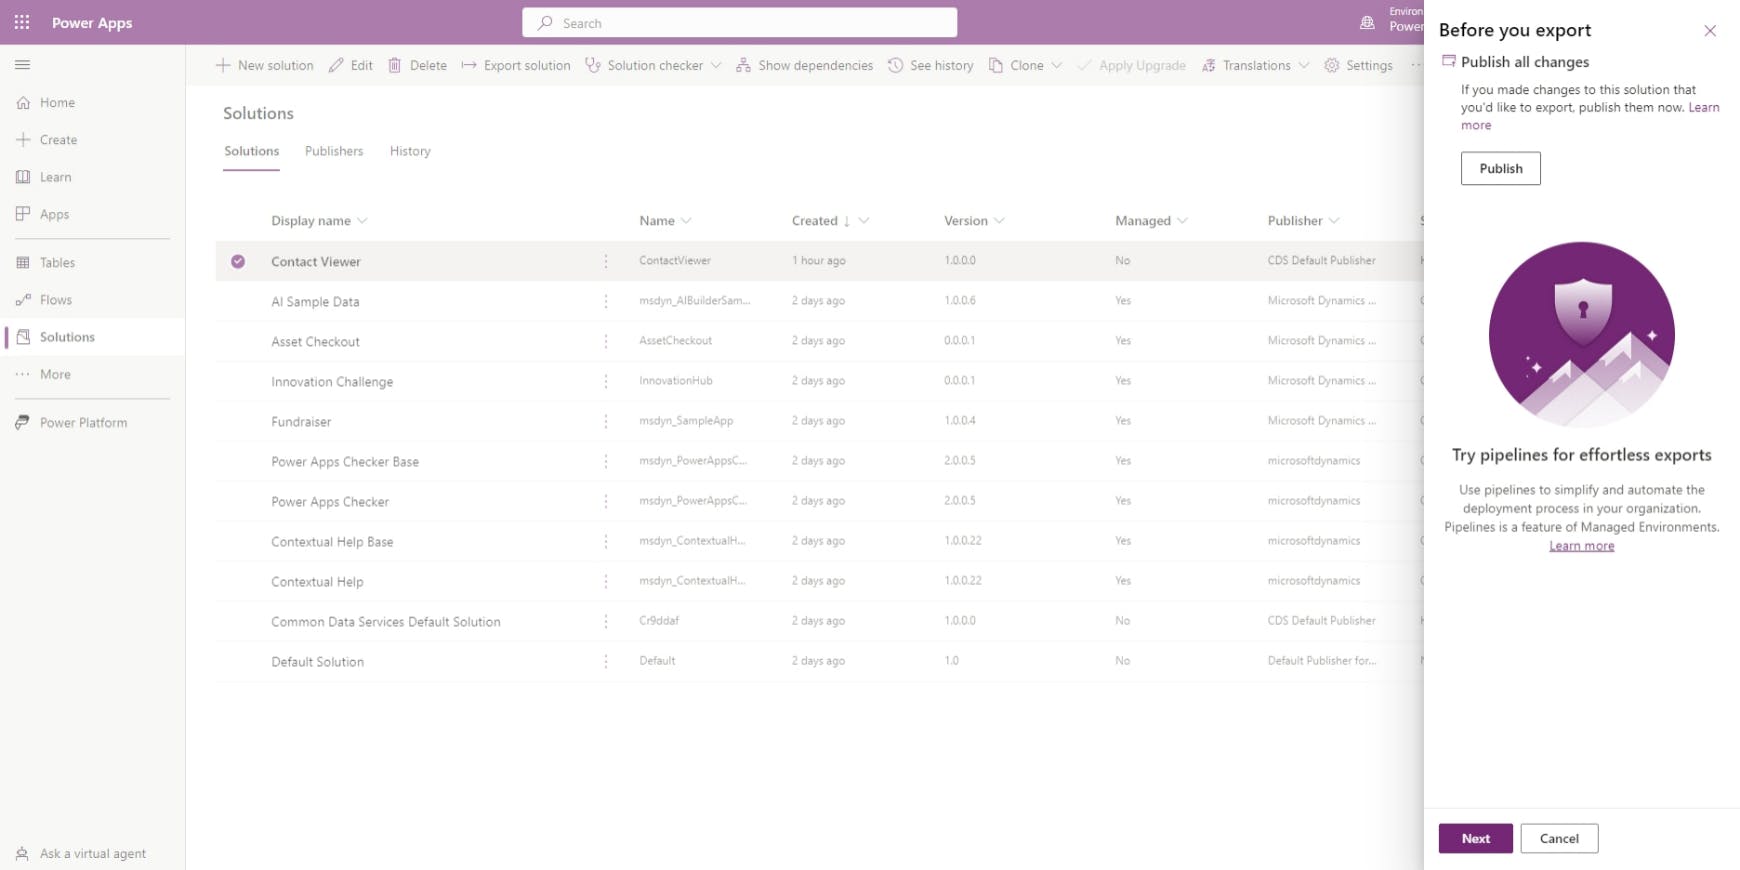
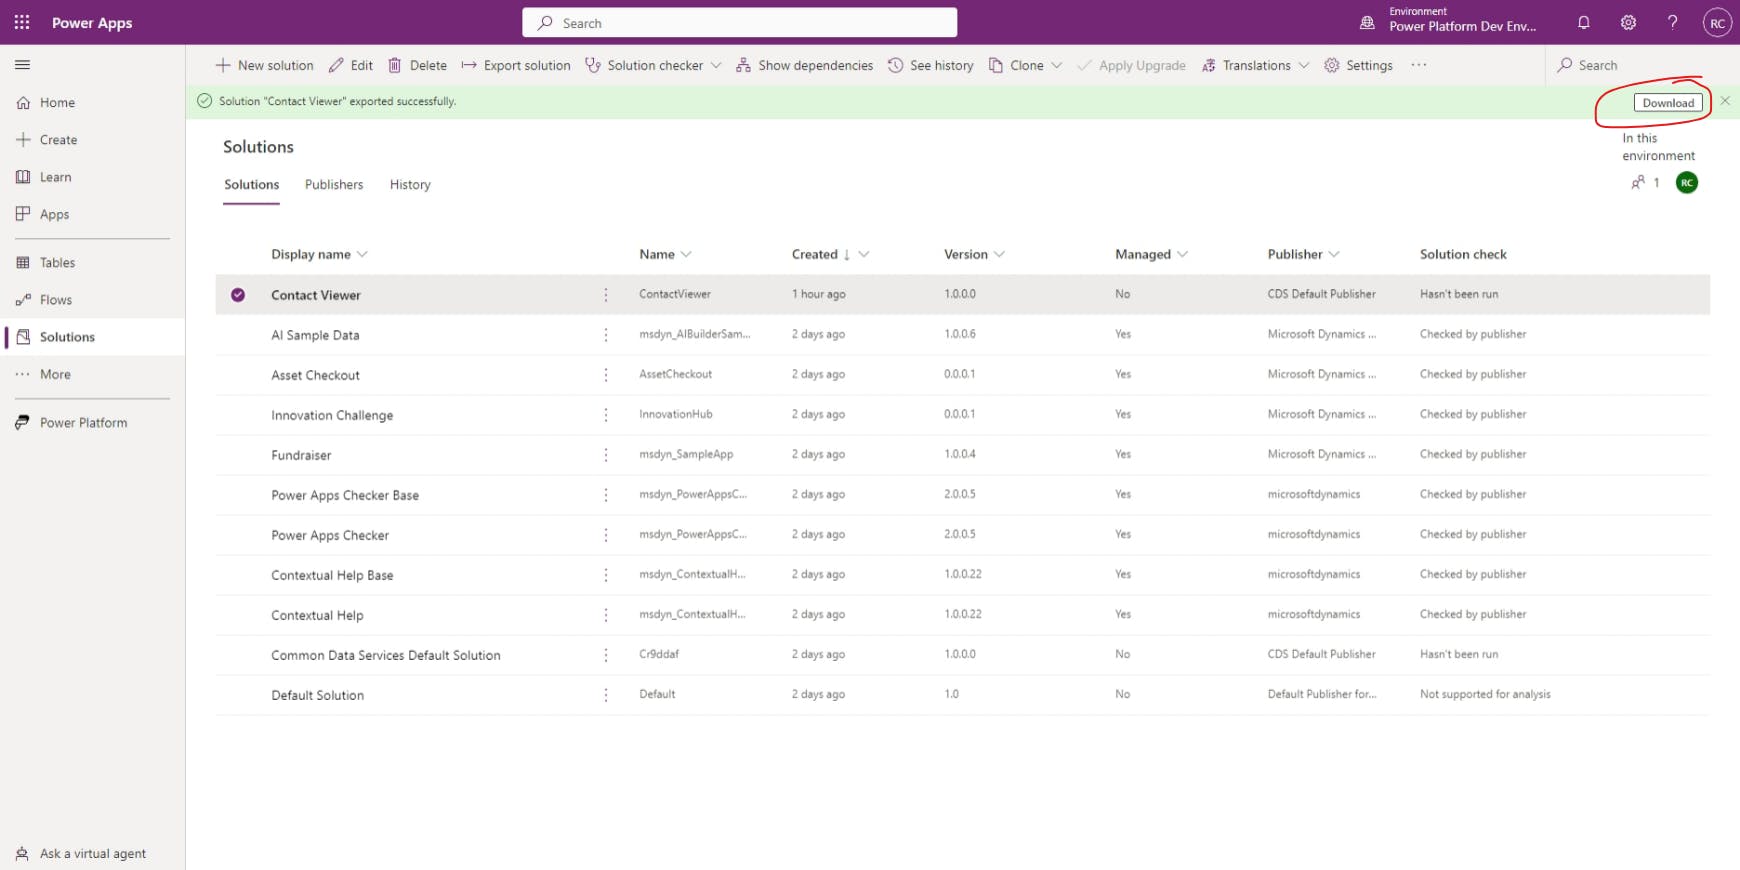
To get the solution onto our local machine, we need to export it out of the Power Platform environment. To do that, go back to make.powerapps.com, select Solutions, and then check the box next to the solution you created earlier. With the solution selected, hit Export solution from the top menu.

We've already published all of our changes, so we can just hit Next.
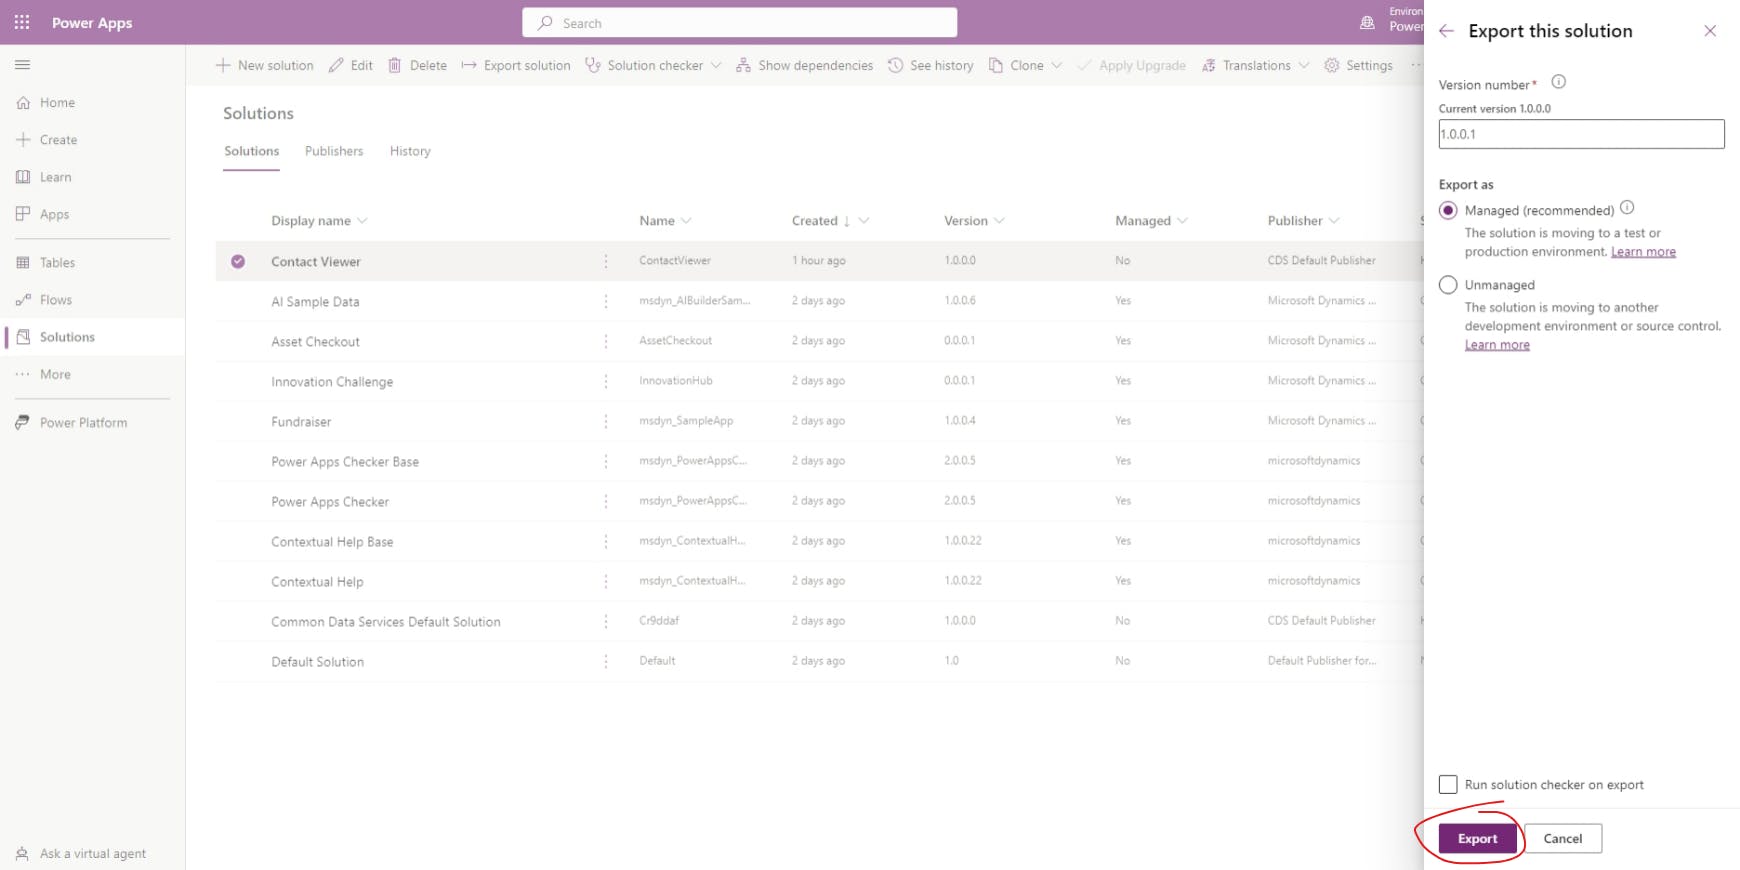
Now this screen is important. When we export a solution from a development environment with the intent to add it to source control and/or deploy it to a test or production (live) environment, we should always make sure to export the solution as managed. Unmanaged solutions are for moving a solution between two development environments only. Once we verify that Managed is selected, let's hit Export.
After a few minutes, the exported solution will be ready for download. Once it is, hit Download.
Unpack solution
Before we can add the solution files to our repo, we need to unpack them. Unpacking is different from unzipping/extracting as it uses a special Power Platform CLI command to prepare the solution specifically for the purpose of checking into source control. This is also necessary because any deployment pipeline you set up later will include a pack solution step which will expect that the solution was properly unpacked.
To unpack your solution and add it to your local repo, use the following command. Be sure to replace the zipfile and folder parameters with the appropriate file paths based on where you downloaded the solution to, and where you cloned your repo to, respectively.
pac solution unpack --zipfile ~/Downloads/ContactViewer_1_0_0_1_managed.zip --folder ~/Documents/Power_Platform_DevOps/solutions/ContactViewer --packagetype Managed
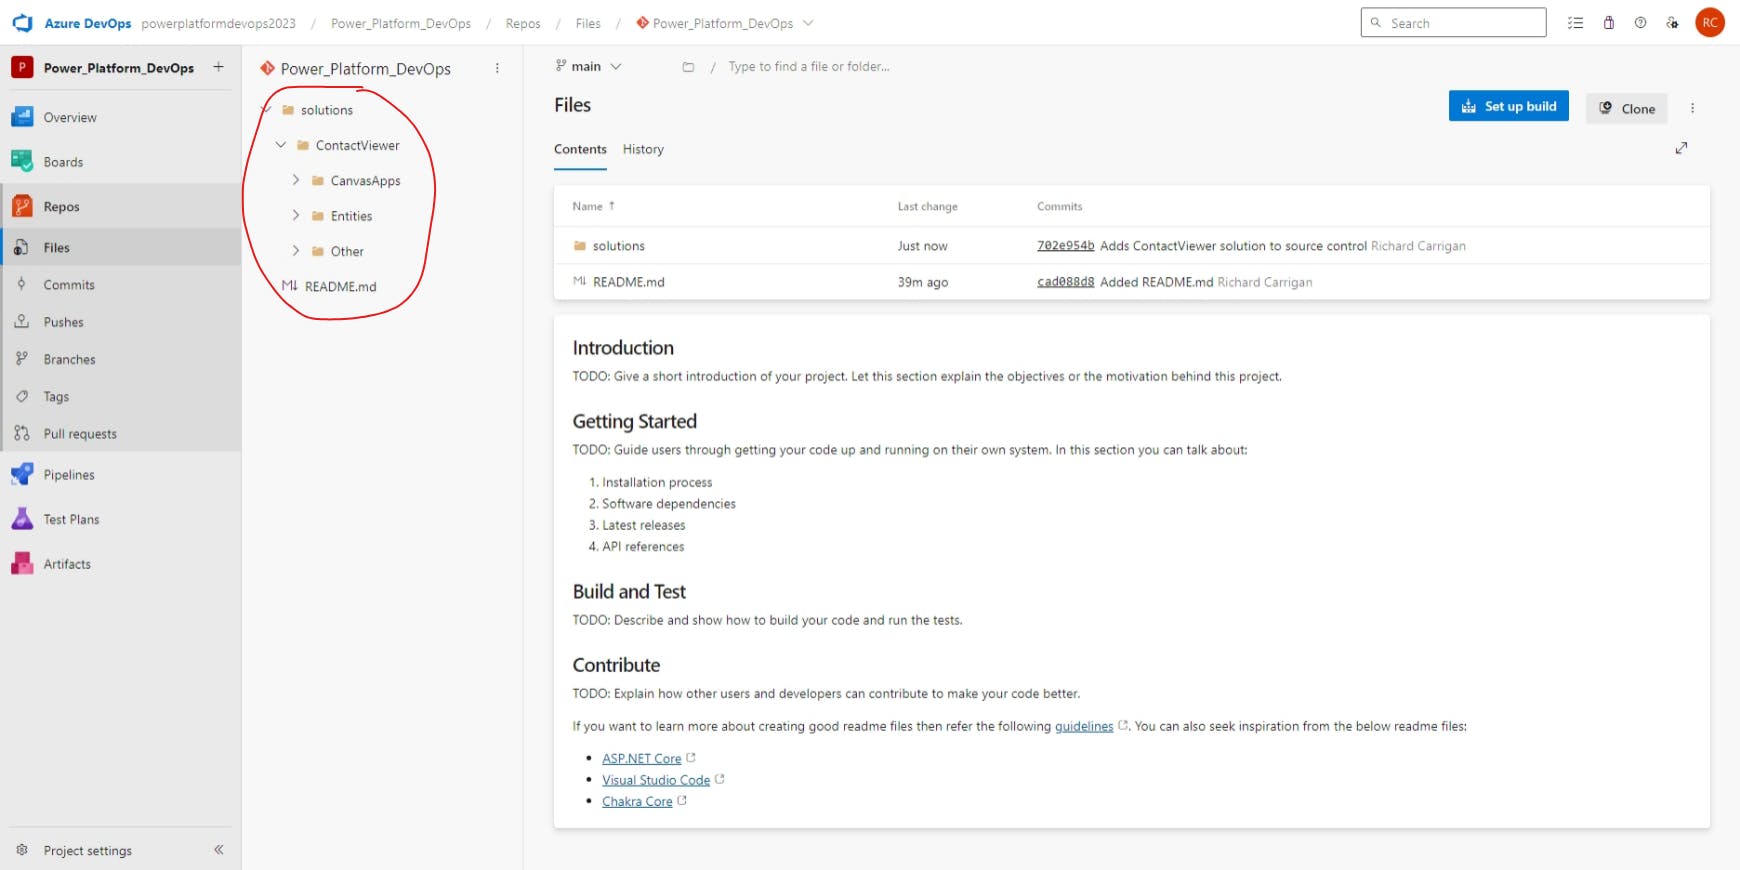
Once that command executes, you should now see that your repo contains a single folder named ContactViewer within your solutions folder, which contains all of the solution components (i.e. CanvasApps and Entities), along with Other necessary files for source control tracking and deployments.

Checking solution into source control
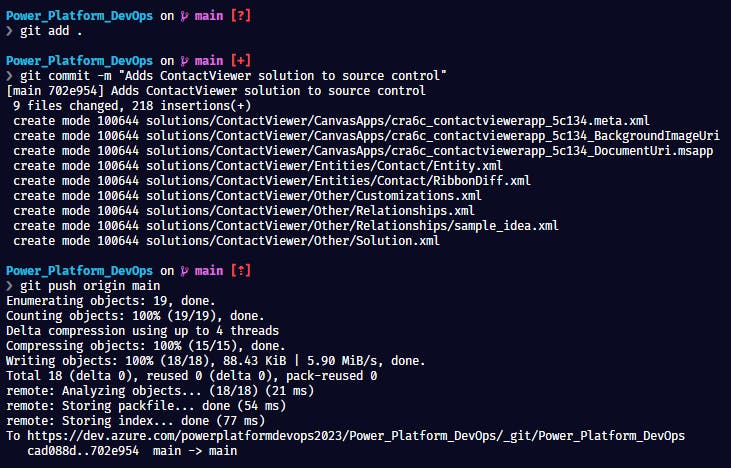
Now that we have exported and unpacked our solution, all that's left is to check it into our Azure DevOps repo. To do that, we'll use the git add, git commit, and git push commands, like so:
git add . # adds all untracked/changed files to the 'staging area' to be committed
git commit -m "Adds ContactViewer solution to source control" # commits the changes to version history
git push origin main # pushes any new local commits to the remote (origin) repo
If the commands all executed successfully, you should see an output similar to this:
And if you go back to your Azure DevOps repo and refresh, you should now see your exported solution files added, like this:
Conclusion
Thanks for sticking around! You have now seen how to track changes in Power Platform components using solutions and Azure DevOps, but this is just the beginning. Now you can build a CI/CD pipeline that will test and deploy your solutions to other environments, which will enable more consistent and traceable deployments.
Thanks for reading and, if you found this article useful, please consider sharing it across your network so others may be able to benefit from this information.
Take care!