


If you're used to working with "full-code" websites or applications, you may be wondering how you can add a Power Pages website to source control (Git) to track changes. Or, maybe you are using Azure DevOps to track work on the website and would like to automatically close work items when you finish making the changes to the website. Or, maybe you have heard about Power Platform ALM but are having trouble trying to figure out how to set it up for your Power Pages website.
Whatever the case may be, I'm here to help. In this tutorial, I'll walk you through every step needed to start using source control to track changes in your Power Pages website, using Azure DevOps. So let's get started!
Azure DevOps setup
First things first, if we want to start working with Azure DevOps, we'll need an account. So go to dev.azure.com and, if you already have an Azure DevOps account, log into that. Otherwise, click Start free or Start free with GitHub, whichever you prefer.
If this is a new Azure DevOps account, you'll be prompted to create a new project. If you're logging into an existing account, you'll need to select + New project in the top-right corner. Once you've reached the new project wizard, simply give your new project a name and hit + Create project. This project will be used to store all of our Power Platform environment files, so the name should reflect that. You may be given the options for version control and agile process, but the defaults are usually fine unless you know you'll need something else.
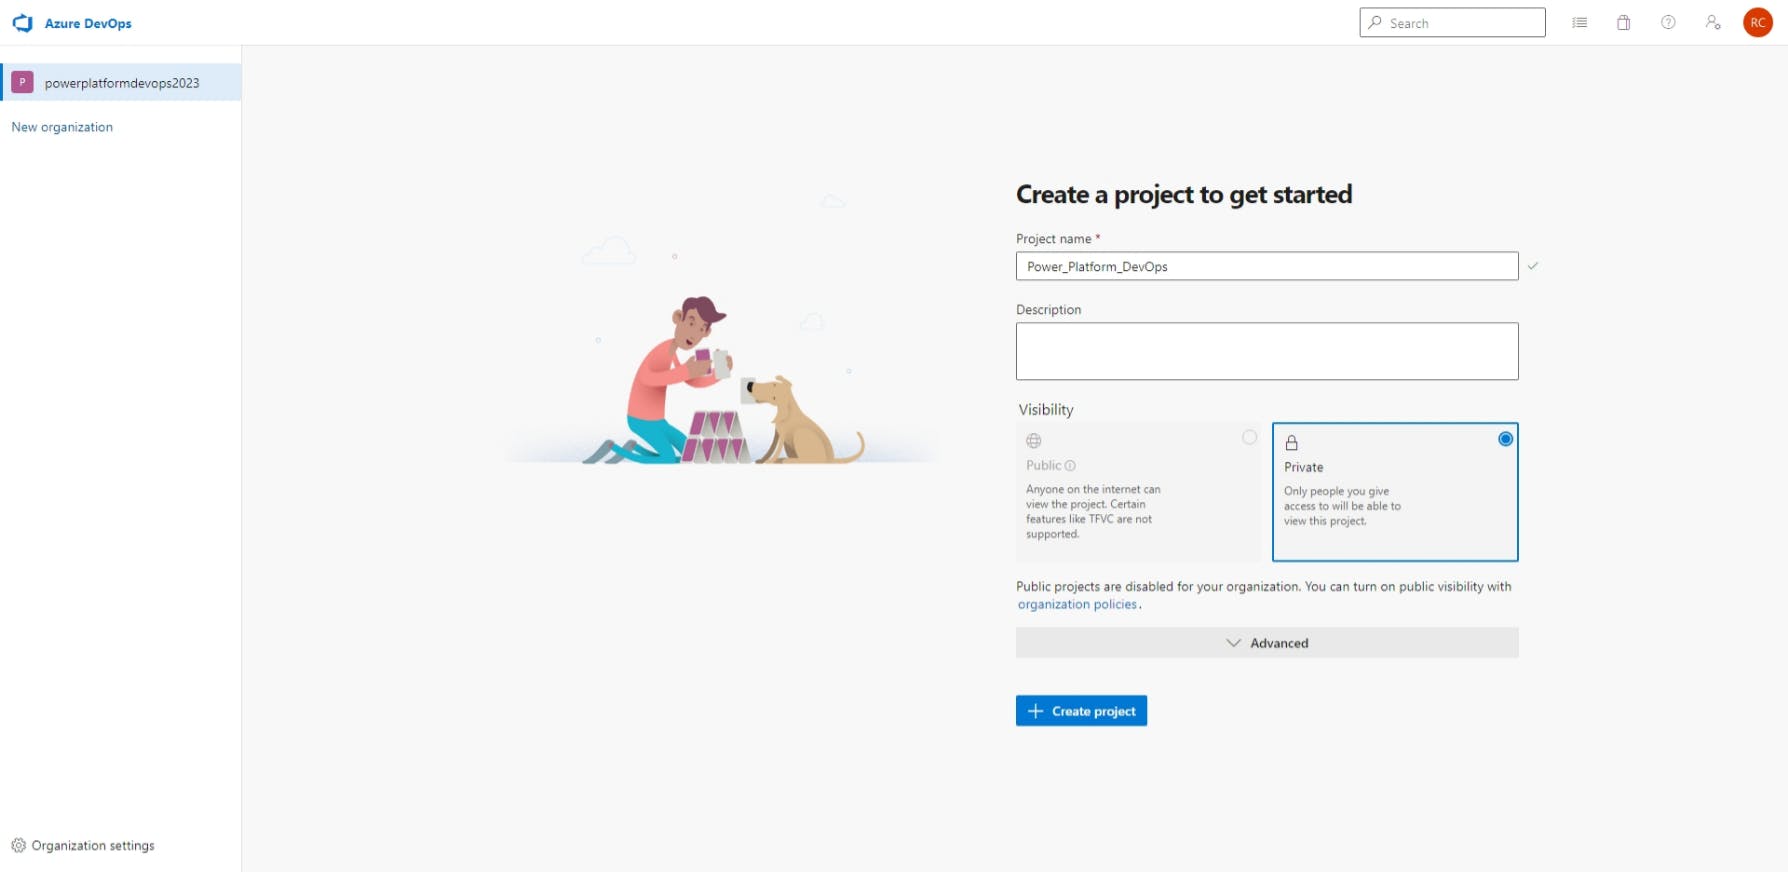
Note: by default in a new Azure DevOps account, all new projects are Private. You can change this by going to Organization settings > Policies (under Security) > Allow public projects.
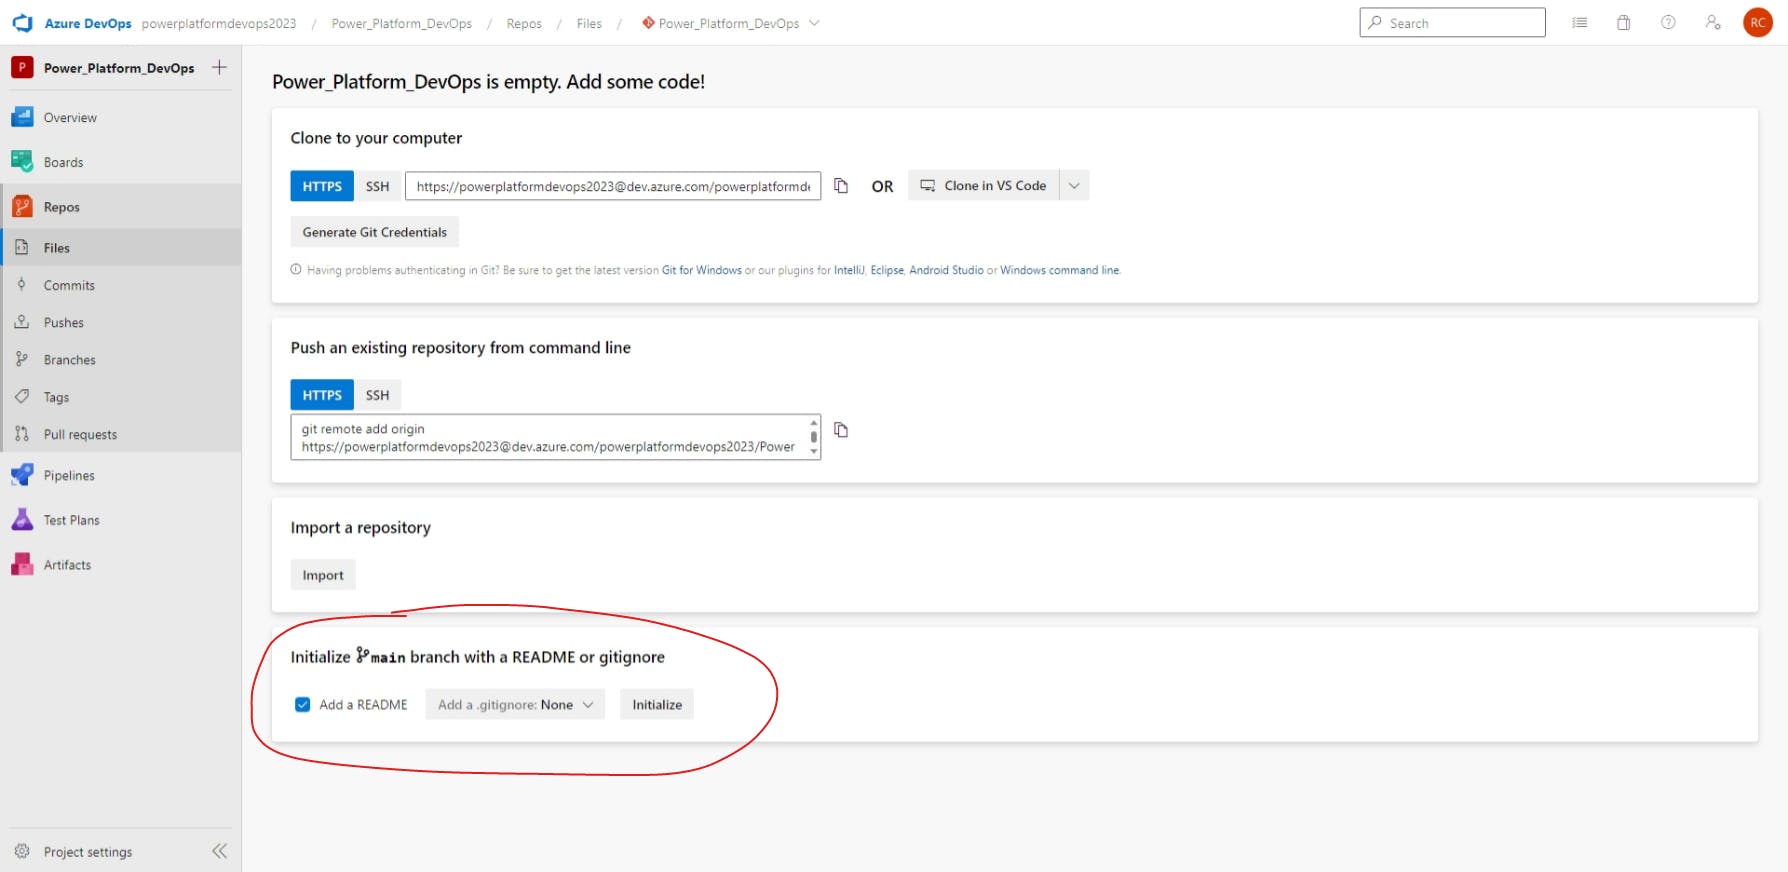
Now that we have a new Azure DevOps project, we need to create a Repo (or repository) to store our Power Pages website contents. To do this, select Repos on the sidebar and then choose Initialize under the heading Initialize main branch with a README or gitignore. We'll want to have the README file, but we don't need a gitignore file for now, so the defaults are fine.
Clone the project repo to our local machine
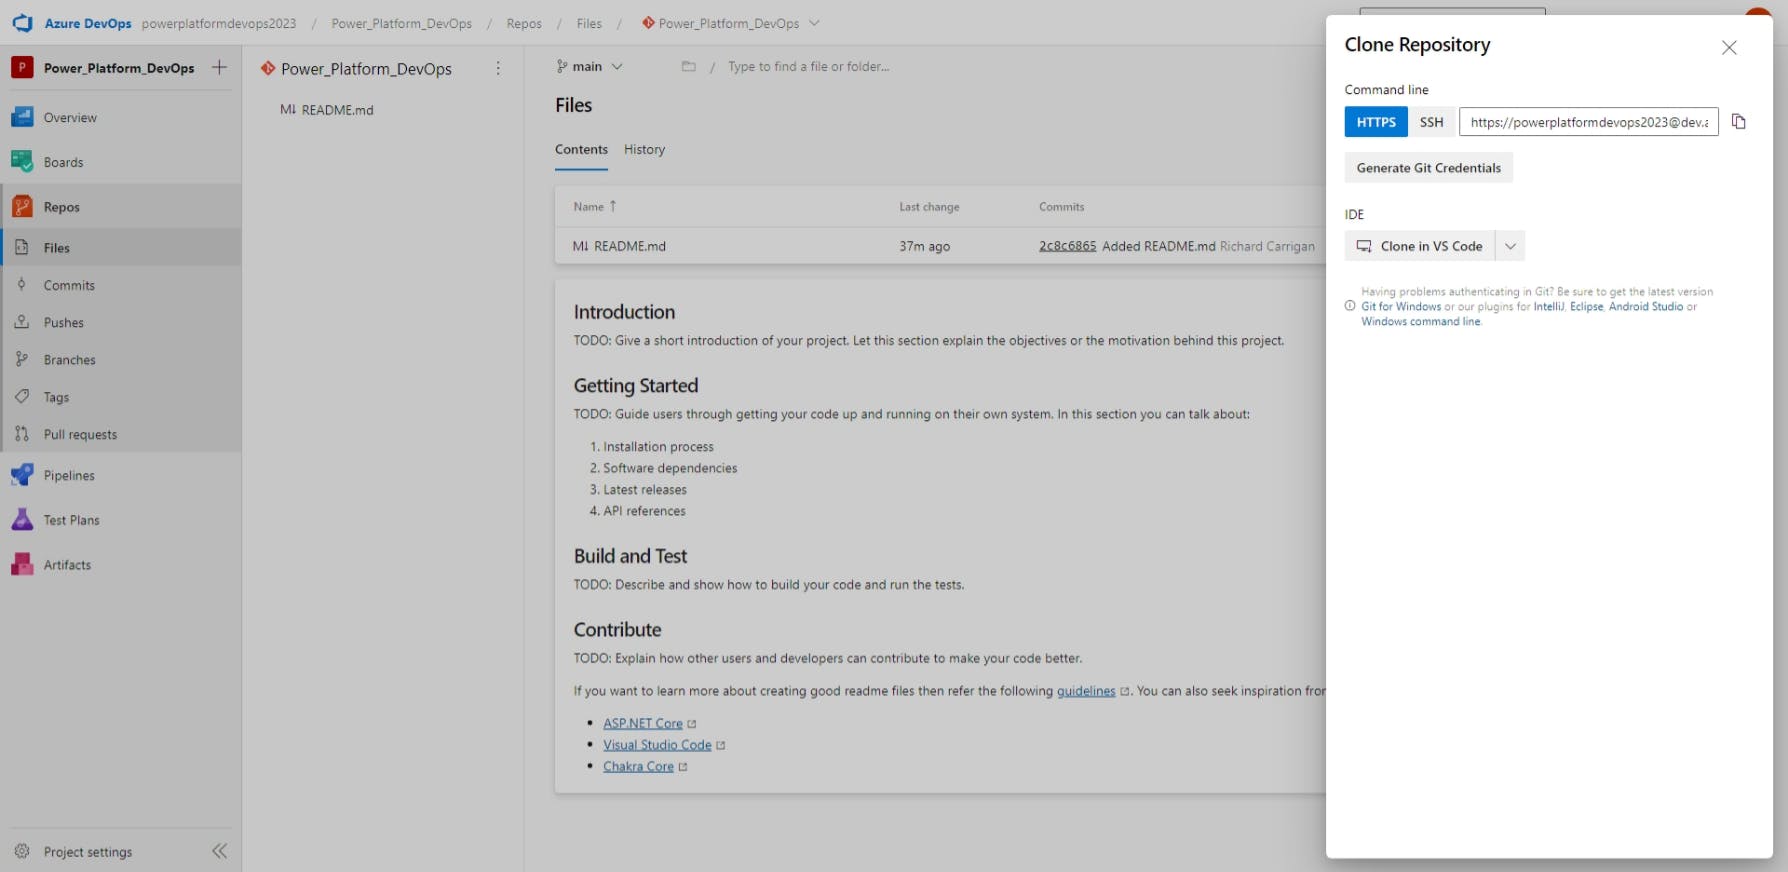
Alright, so we have our Azure DevOps project set up. Next, we need to connect a folder on our local machine to the new project. To do that, select Clone in the top-right and then copy the HTTPS URL provided. Alternatively, if you know what you're doing, you could also use SSH or the Clone in VS Code option if you already have that installed.
Note: the following steps assume that you already have Git installed. If that is not the case, follow these instructions before continuing.
Back on your local machine, open a new terminal window (Git Bash, Windows Terminal, etc.) and navigate to the directory where you want your Power Pages website files stored (i.e. Documents folder) and then use git clone to copy your newly-created repo into this directory. For example:
cd ~/Documents
git clone https://powerplatformdevops2023@dev.azure.com/powerplatformdevops2023/Power%20Platform%20DevOps/_git/Power_Platform_DevOps
Once the cloning process finishes, you'll have a directory named the same as your Azure DevOps project, Power_Platform_DevOps.
Ok, so now we have a directory on our local machine containing a README file. What now? Thank you for asking 😀! Next, we need to download the Power Pages website files into this new directory, and then upload those files to our newly-created Azure DevOps repo.
But first, let's use the following commands to create a websites directory to store these files in. This will make it easier for us to distinguish between the files need for our Power Pages website and other files that are part of our Power Platform environment, such as Power Platform solutions.
cd Power_Platform_DevOps
mkdir websites
Download Power Pages website files
Note: as of March 2023, the Microsoft Power Platform CLI, which is necessary for downloading Power Pages website files, is only available through PowerShell. If you don't have it already, you can follow the instructions on Microsoft Learn for how to Install PowerShell on Windows, Linux, and macOS.
To download the files for our Power Pages website, we'll need to go through the following steps:
Install the Microsoft Power Platform CLI tool.
Authenticate to our Power Platform environment.
Get the ID for our website.
Download the files.
Install the Microsoft Power Platform CLI tool
If you have Visual Studio Code installed, which I highly recommend if you're working with the Power Platform locally, you can Install using Power Platform Tools for Visual Studio Code. Otherwise, you'll want to follow the instructions to Install Power Platform CLI for Windows.
Authenticate to our Power Platform environment
Once you have the Microsoft Power Platform CLI tool installed, enter the following command into PowerShell:
pac auth create -u [Dataverse URL]
Note: to find your Dataverse URL, go to the Environments list on the Power Platform Admin Center and select the environment you're working with. The Environment URL is the one you need, and it is listed in the top-left of the Details section.
This command will create a new authentication profile associating your Microsoft account with the Power Platform environment, so you don't have to re-authenticate every time you need to interact with it.
Get the ID for our website
Now that we've authenticated, we'll need to get the ID for our Power Pages website, as the download command will need it. We can do this by listing all of the websites using the following command:
pac paportal list
Why
paportal? This is because Power Pages was previously referred to as Power Apps Portals and subsequently, some of the documentation and CLI commands still refer to it as such.

You should get an output similar to the above image, listing all of the websites in this Power Platform environment, with a column for the Website Id. Copy this field as we'll need it for the next command.
Download the files
Alright, we're finally ready to download the files. Using the path to your websites folder and the Website Id you collected in the last step, run the following command:
pac paportal download --path [PATH] -id [Website Id]
If done correctly, you should see a message similar to "[your website name] download succeeded in 15.4692731 secs". If you encountered an error, double-check the command syntax (notice that --path has two dashes whereas -id only has one) and make sure you've provided the correct path and website ID.
Upload portal contents to ADO repo
Now that we have all of our website files added to the websites folder of our local repo, we're ready to commit the changes and push them back up to our Azure DevOps project. To do this, run the following commands from within the repo (not the websites folder):
git add .
git commit -m "Start tracking website files in source control"
git push origin main
Note: if you encounter an error saying "Filename too long" when trying to add the files, you will need to open your terminal as an administrator and run
git config --system core.longpaths true.
Once these commands finish executing, you can refresh your project in Azure DevOps and you'll now see all of your website files.

Hooray! You are now using source control to track changes to your Power Pages website. Now you can make changes either online or locally, and then upload those changes to Azure DevOps.
This is great, but what's the point?
Source control is just the first step towards a full DevOps workflow. In a future article, I'll show you how to configure a DevOps pipeline to deploy your changes from the Power Platform development environment to another environment for testing or to a production environment for live use.
Thanks for reading and, if you found this article useful, please consider sharing it across your network so others may be able to benefit from this information.
Take care!