


Microsoft Dataverse plugins is a feature of the Power Platform that allows you to add custom event handlers, defined in C# code, that are triggered when specific events occur within your business processes. There are other, no-code ways of handling events in Power Platform, such as Power Automate Flows and custom workflows, which should be explored first. However, if those options don't quite fit the business requirements, then writing a Dataverse plugin is a great option for extending the functionality of the Power Platform.
Note: This tutorial is based largely on the "Write and register a plug-in" tutorial outlined in the Microsoft Dataverse developer guide but has been adapted for Visual Studio Code.
By the end of this tutorial, you will be able to create a new plugin from scratch, add event-driven custom business logic, and deploy it to your Power Platform environment.
Get the tools
Before we can create our first plugin, we need to make sure we have all the necessary tools, which are:
In addition to these tools, you'll also need to have a Power Platform environment as well as a model-driven app that includes the account and task tables. To create both of these, follow these tutorials:
Once you have all of these tools installed and have an environment to deploy your plugin to, you're ready to get started.
Create the plugin
Normally in Visual Studio, creating a new Dataverse plugin would involve the following steps:
Create a new C# class library project, with an associated solution.
Add the
Microsoft.CrmSdk.CoreAssembliesNuget package.Sign the assembly (creates the necessary .snk file).
To perform these same steps in VS Code, the process is even more complicated, as you would have to install another tool to perform the assembly signing, as VS Code doesn't have this feature built-in as Visual Studio does.
Fortunately, since we are using the Power Platform Tools extensions for VS Code, we can simply open our integrated terminal (Ctrl/Cmd + ~) from within VS code and run the following commands and it will take care of everything:
# Navigate to documents folder - change this to wherever you want the project folder
cd ~/Documents

# Create the project folder to store the plugin code files
mkdir myFirstPlugin

# Navigate into the project folder
cd myFirstPlugin

# Initialize a new plugin
pac plugin init
# Output: "Dataverse plugin class library with name 'myFirstPlugin' created successfully in current directory."

# Reload VS Code with the newly-created project folder open
code myFirstPlugin -r
Running the pac plugin init command will create the following resources:
A new project with the same name as the project folder (e.g.
myFirstPlugin.csproj).PluginBase.csfile containing necessary boilerplate plugin code.Plugin1.csfile with minimal "best practices" configuration, ready for you to add your custom business logic..snkfile with the same name as the project folder, configured so that your plugin is recognized as being signed, which is required by Power Platform for deployment into an environment.A
.vscodefolder and a.gitignorefile with a default configuration, to help make plugin development easier and more consistent.
Add custom business logic
Now that we've created our first plugin, let's add the business logic so that it actually does something!
Let's rename the Plugin1.cs file (select the file name and press F2) to FollowupPlugin.cs. Now, within the FollowupPlugin.cs file, replace the existing code with this:
using Microsoft.Xrm.Sdk;
using System;

namespace myFirstPlugin
{
    /// <summary>
    /// Plugin development guide: https://docs.microsoft.com/powerapps/developer/common-data-service/plug-ins
    /// Best practices and guidance: https://docs.microsoft.com/powerapps/developer/common-data-service/best-practices/business-logic/
    /// </summary>
    public class FollowupPlugin : PluginBase
    {
        public FollowupPlugin(string unsecureConfiguration, string secureConfiguration)
            : base(typeof(FollowupPlugin))
        {
            // TODO: Implement your custom configuration handling
            // https://docs.microsoft.com/powerapps/developer/common-data-service/register-plug-in#set-configuration-data
        }

        // Entry point for custom business logic execution
        protected override void ExecuteDataversePlugin(ILocalPluginContext localPluginContext)
        {
            if (localPluginContext == null)
            {
                throw new ArgumentNullException(nameof(localPluginContext));
            }

            var context = localPluginContext.PluginExecutionContext;

            // Create a task activity to follow up with the account customer in 7 days.
            Entity followup = new Entity("task");

            followup["subject"] = "Send e-mail to the new customer.";
            followup["description"] =
                "Follow up with the customer. Check if there are any new issues that need resolution.";
            followup["scheduledstart"] = DateTime.Now.AddDays(7);
            followup["scheduledend"] = DateTime.Now.AddDays(7);
            followup["category"] = context.PrimaryEntityName;

            // Refer to the account in the task activity.
            if (context.OutputParameters.Contains("id"))
            {
                Guid regardingobjectid = new Guid(context.OutputParameters["id"].ToString());
                string regardingobjectidType = "account";

                followup["regardingobjectid"] = new EntityReference(
                    regardingobjectidType,
                    regardingobjectid
                );
            }

            // Create the task in Microsoft Dynamics CRM.
            localPluginContext.PluginUserService.Create(followup);
        }
    }
}
This code will send an e-mail reminder to the creator of the account 7 days after creation, reminding them to follow up with the customer.
Before we prepare to deploy this plugin, let's make sure it builds properly. To do this, run dotnet build from the integrated terminal and make sure there are no errors.
Register the plugin using Plugin Registration Tool
With plugins, instead of "deploying" them, you "register" them with the environment. To do this, we use a tool that comes with the Power Platform Tools extension for VS Code, called the Plugin Registration Tool, or PRT for short.
With your project still open in VS Code, open your integrated terminal and run the following command to open the Plugin Registration Tool interface:
pac tool prt
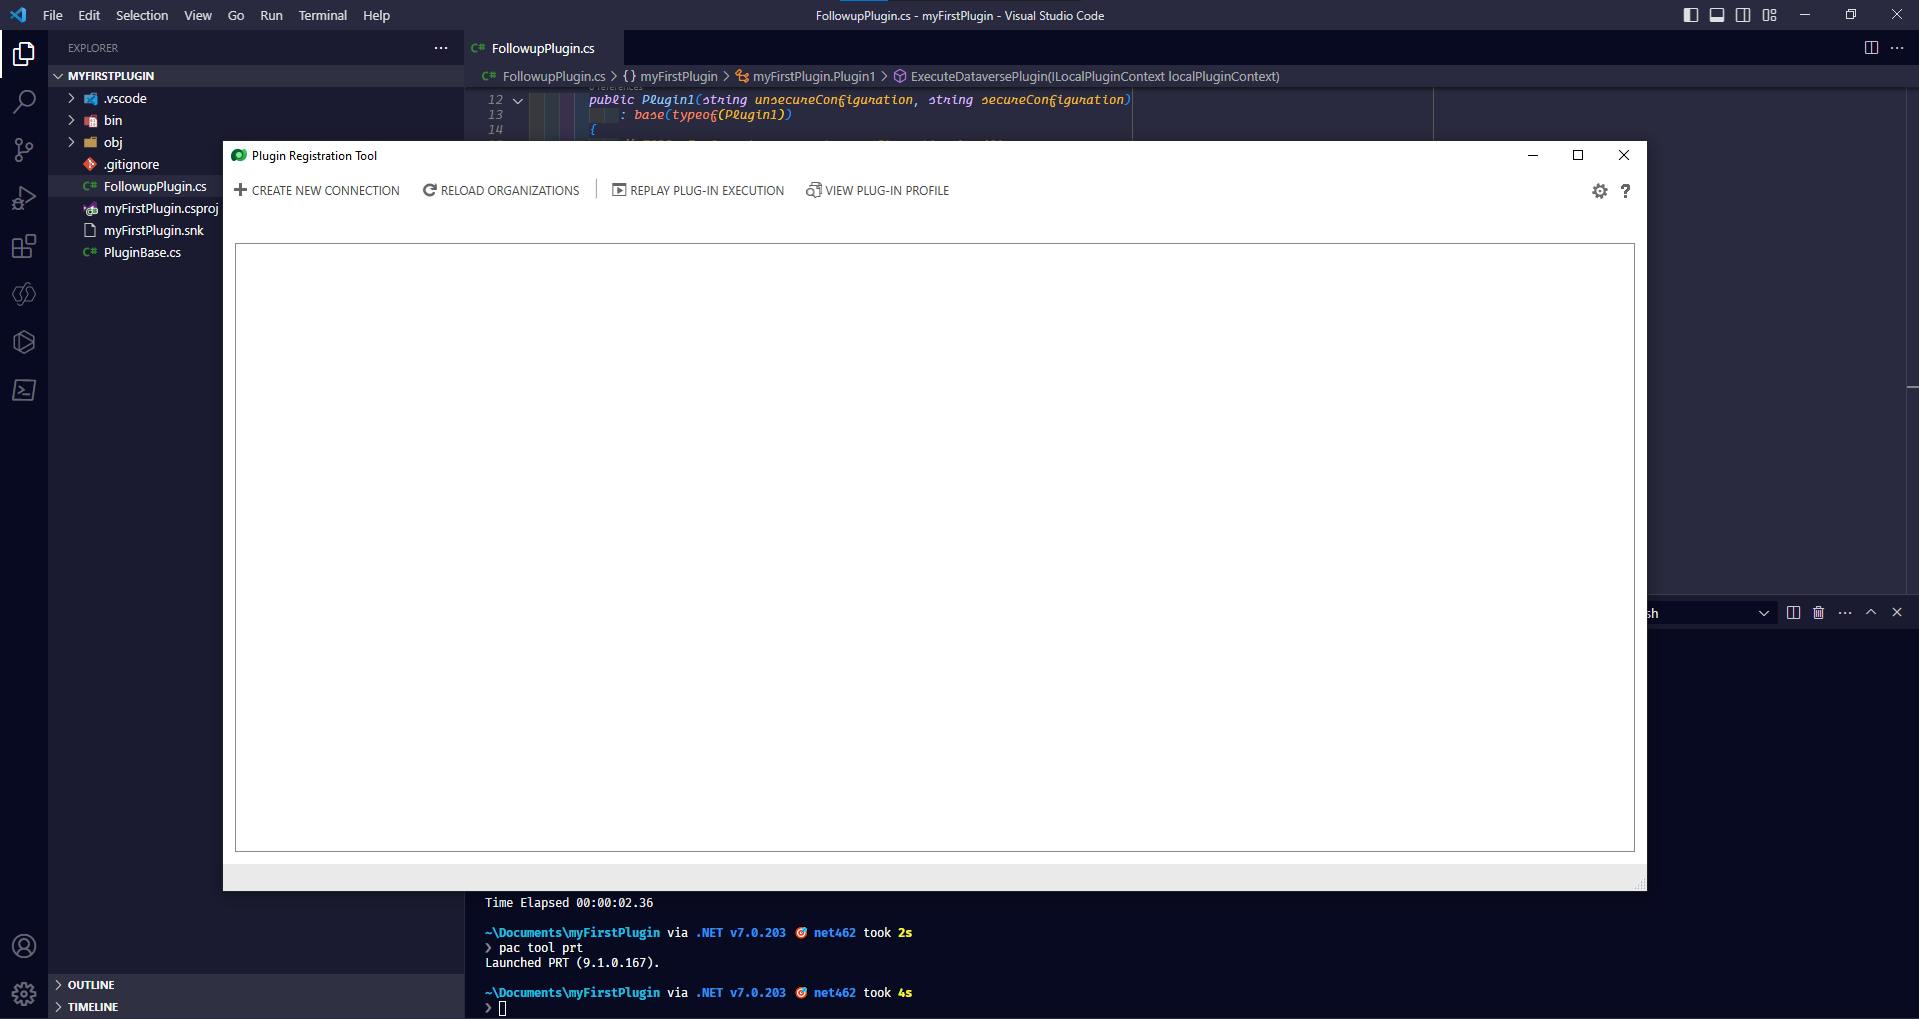
Once you run this command, the tool should open to a blank screen, like this:
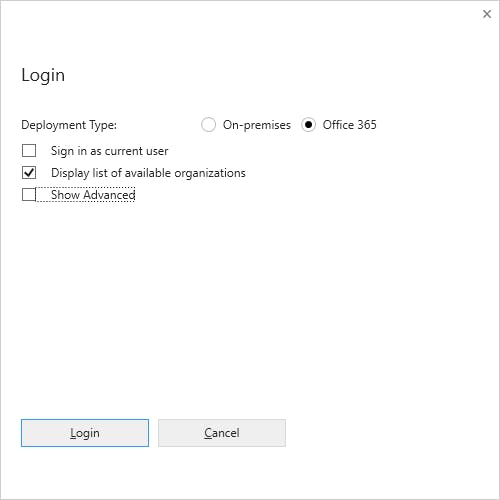
Once this window opens, select + CREATE NEW CONNECTION. This will prompt you to log in. From here, choose Office 365, check the box for Display list of available organizations, and then hit Login.
Once you've successfully authenticated, you should see a list of the available organizations for your account, like so:
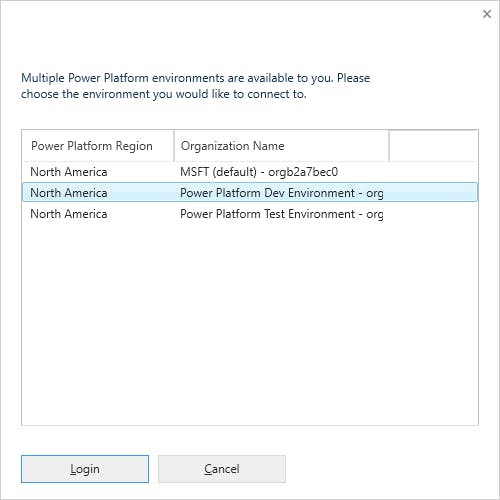
Select the Power Platform environment that you want to register this plugin with and then hit Login again. This process can take a bit, but once it's done, you should see a list of all registered plugins.
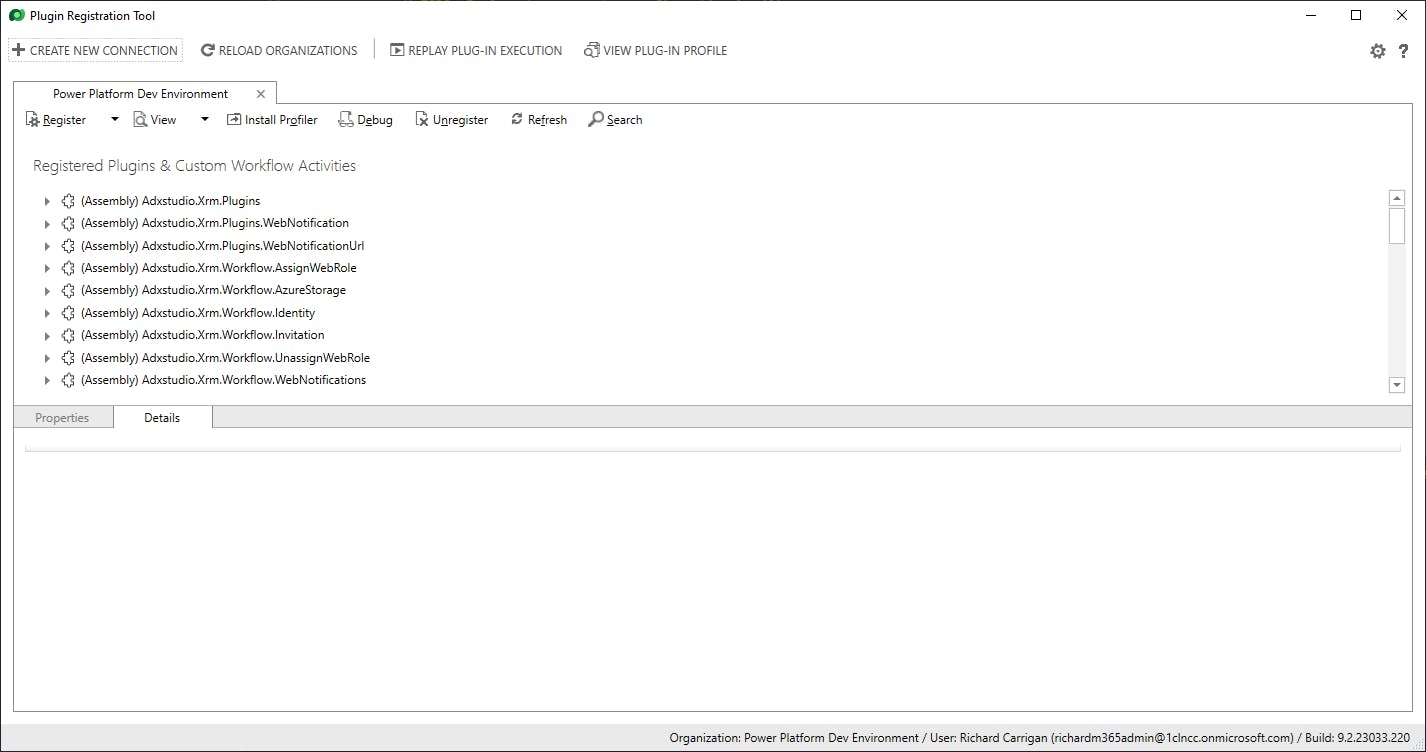
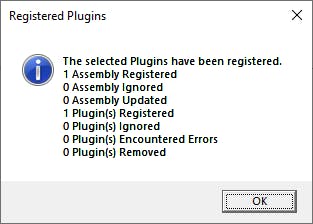
To register your newly-created plugin, select the dropdown arrow next to Register and choose Register new assembly. From here, browse and select the .dll file for your plugin (e.g. ~/Documents/myFirstPlugin/bin/Debug/net462/myFirstPlugin.dll), leave the defaults selected, and hit Register Selected Plugins. If you did this correctly, you should see a message similar to the one below, which states "1 Assembly Registered" and "1 Plugin(s) Registered".
Connect plugin to event
Now that we've registered our custom plugin with the Power Platform environment, you might think we're done. However, if we stopped here, the event would never be triggered, as it's not connected to a specific event. To do that, we need to "Register a new step". Still within the Plugin Registration Tool, right-click on your plugin (e.g. "(Assembly) myFirstPlugin") and select Register New Step. You can also do this by selecting the plugin and then choosing Register New Step from the Register dropdown.
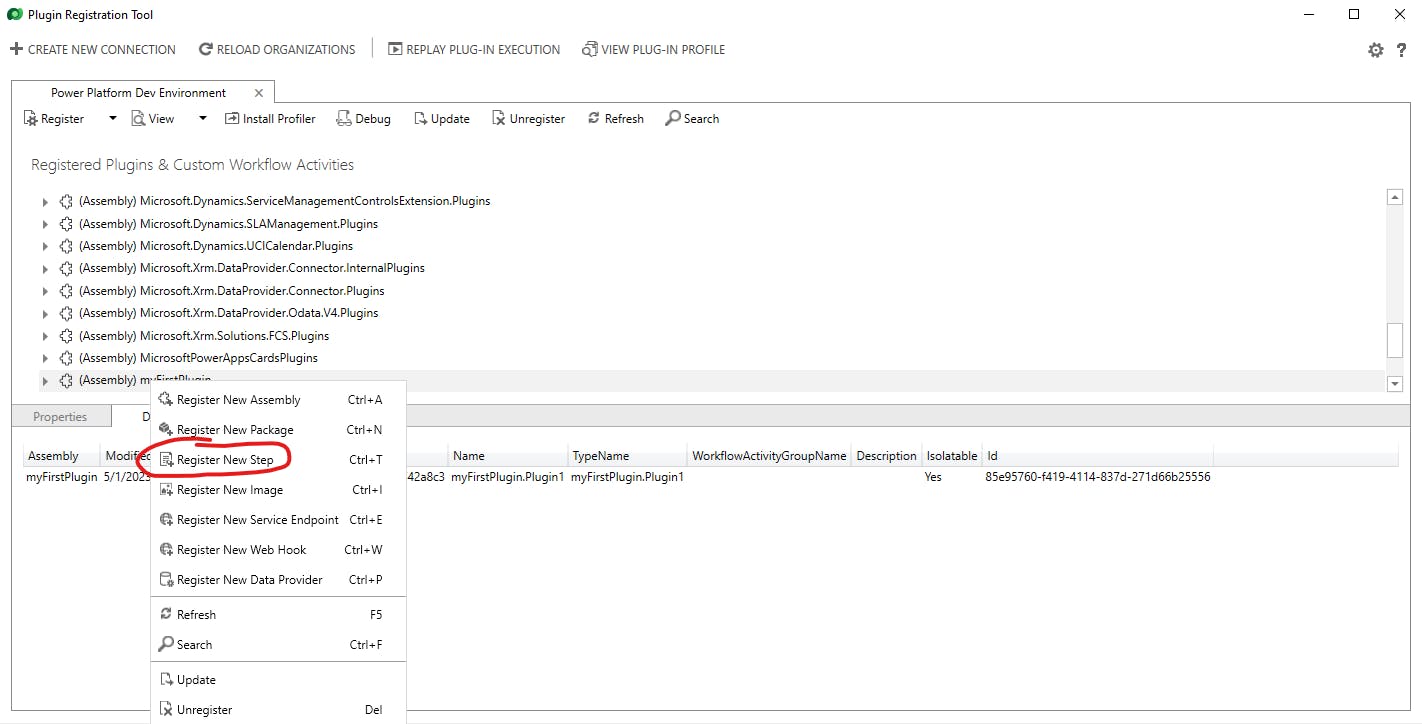
In the Register New Step form, the Message will be "Create", the Primary Entity should be "account", the Event Pipeline Stage of Execution should be "PostOperation", and the Execution Mode should be "Asynchronous". This means that our custom plugin will be triggered after (PostOperation) a new account has been created, and will run asynchronously. Leave the rest of the fields as their default values and hit Register New Step.

Conclusion
Congratulations! You have now created a custom plugin using Visual Studio Code that sends an email to a user 7 days after they create a new account (contact) record, reminding them to follow up with that contact. If you want to test the new plugin, simply create a new account record and then go to Related > Activites (Activities is where any email or phone call records associated with the account are stored).
Now that you know how to create and deploy custom plugins, explore the .NET Organization Service SDK to see all the ways you can interact with your entities: Use the Organization service - Power Apps | Microsoft Learn.
Thanks for reading and, if you found this article useful, please consider sharing it across your network so others may be able to benefit from this information.
Take care!