


After you've been working with the Power Platform for some time, it will become obvious that it can be difficult to present changes to an existing solution to stakeholders for approval without those same changes being immediately visible to your users. To solve this problem, you'll want to have at least 3 separate Power Platform environments, with a copy of the solution in each environment. These 3 environments will become your Development (Dev), Test, and Production (Prod) environments. Later on in this article, I'll guide you through deploying your solutions to each of these environments, but for now, I want to give you a high-level overview of what a typical development workflow will look like with this configuration.
Requested changes are worked on in the Dev environment.
Once the developer is satisfied with the changes, they are then deployed to the Test environment.
In the Test environment, stakeholders review the changes and provide approval.
Once changes are approved, changes are then deployed to the Prod environment.
This workflow will allow you to simultaneously work on new features while awaiting approval on previously completed features, all while ensuring that users only see the features that have been fully reviewed and approved.
This multi-environment configuration is formally referred to as Application Lifecycle Management, or ALM for short. For more information on Power Platform ALM as a whole, refer to Application lifecycle management (ALM) with Microsoft Power Platform.
Prerequisites
Before we can get started, you'll need to have at least 2 Power Platform environments created. You will also need to have an Azure DevOps project created, with a repo containing a Power Platform solution that has been exported and unpacked from your Dev environment. If you don't have these set up yet, or if you want to start with the same setup as mine to make following along easier, you can follow my guides on How to create a Power Platform test environment and Using source control with Azure DevOps and Microsoft Power Platform to do so, and then come back here when you're done.
Great! We're now ready to set up our Azure DevOps pipeline to deploy our Power Platform solution.
Create a new Azure DevOps pipeline
While it is possible to use the Power Platform CLI to upload our solution to our Test and Prod environments, it's not the best use of our time. Furthermore, if we went that route, we would need to document the entire process and hope that all of the developers on our team follow the same process. Instead, let's set up an Azure DevOps pipeline so that our website content automatically gets uploaded to the Test and Prod environments.
Note: this pipeline requires the Power Platform Build Tools to be added to Azure DevOps, as well as a service connection to your target environment. See Get Microsoft Power Platform Build Tools for instructions on how to configure both.
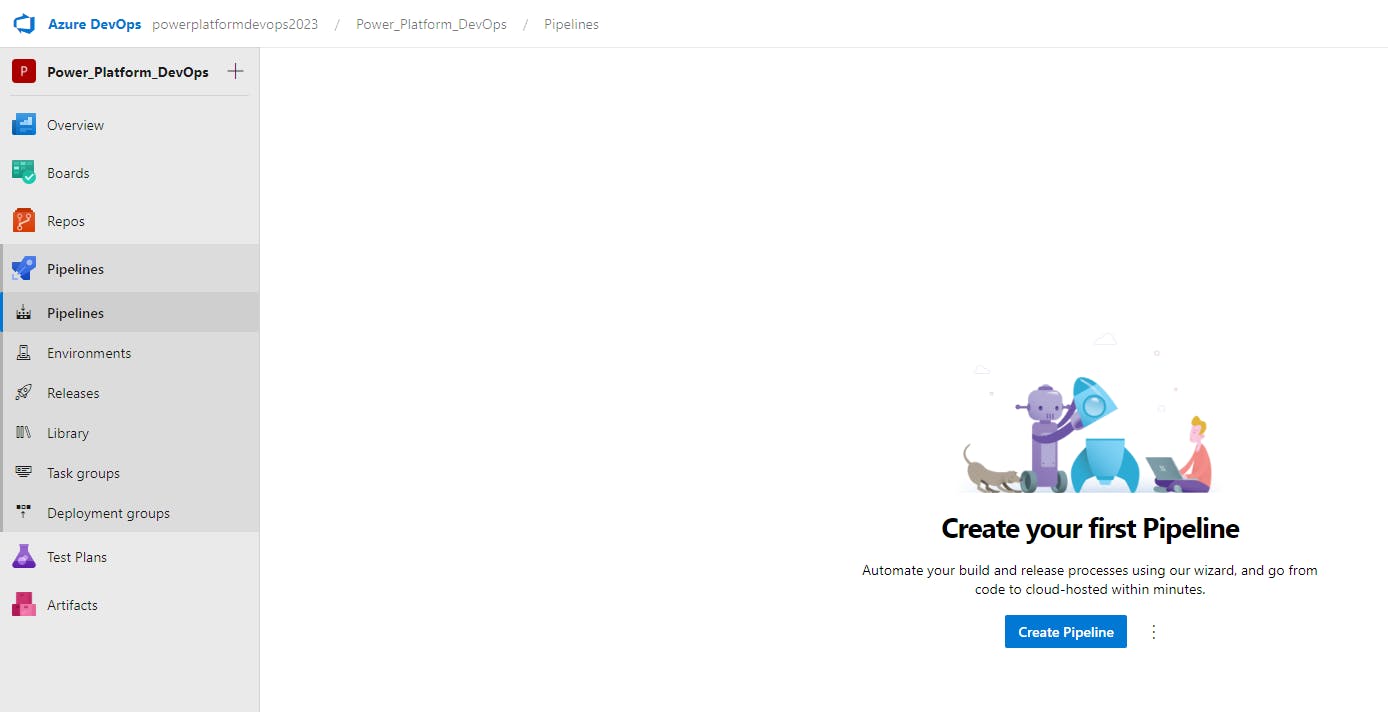
Within the Pipelines section of your Azure DevOps project, let's go to Pipelines and select Create Pipeline.
From here, choose the following options:
Azure Repos Git
Repo name (i.e.
powerplatformdemos)Starter pipeline
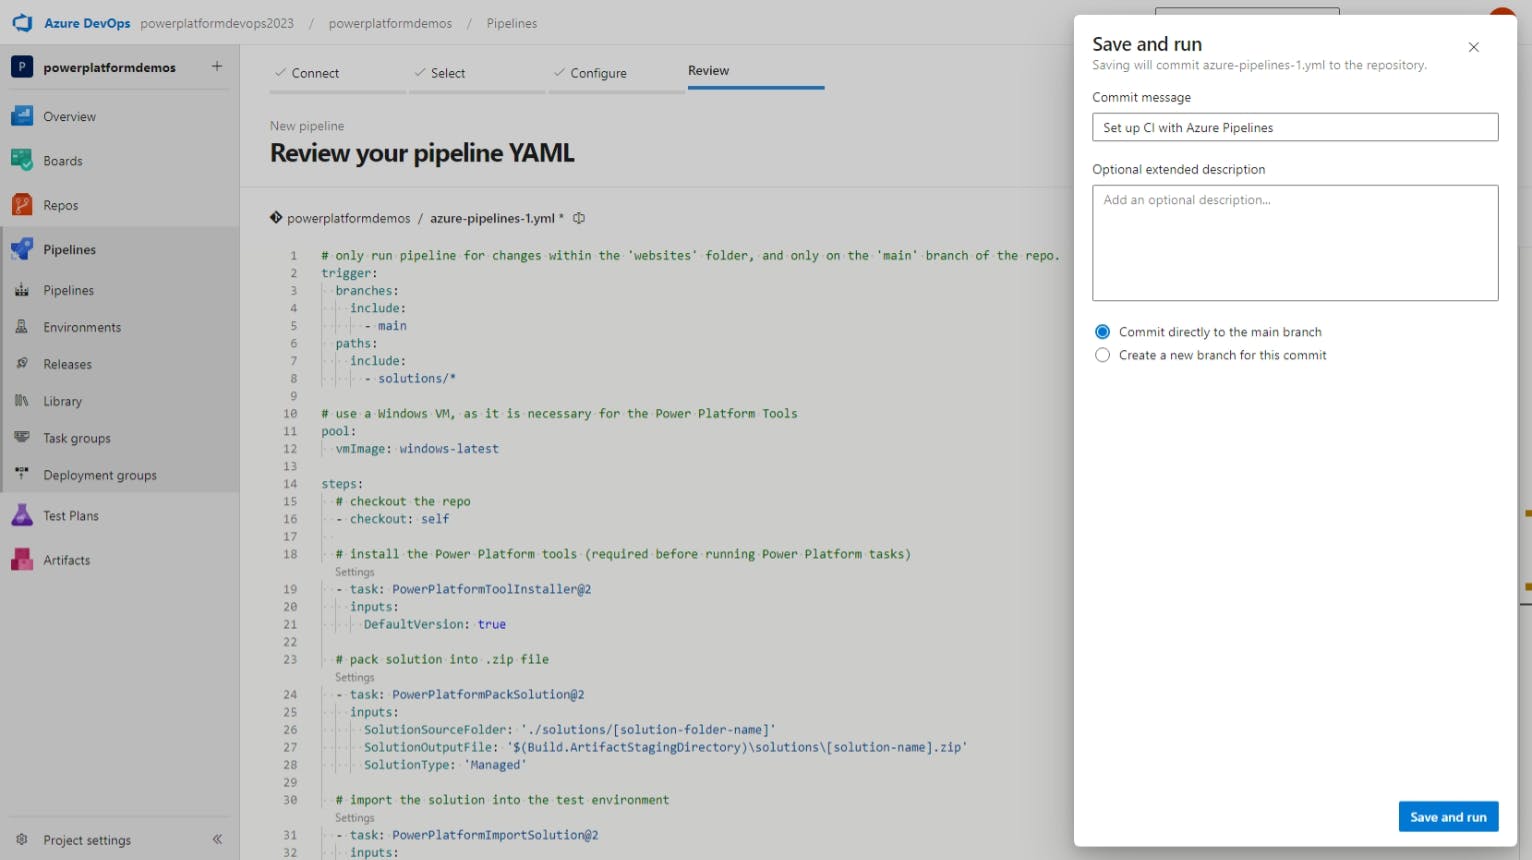
This will create a new azure-pipelines.yml file at the root of your project repo. With this file open in Azure DevOps, replace the default code with the following:
# only run pipeline for changes within the 'websites' folder, and only on the 'main' branch of the repo.
trigger:
  branches:
    include:
      - main
  paths:
    include:
      - solutions/*

# use a Windows VM, as it is necessary for the Power Platform Tools
pool:
  vmImage: windows-latest

steps:
  # checkout the repo
  - checkout: self

  # install the Power Platform tools (required before running Power Platform tasks)
  - task: PowerPlatformToolInstaller@2
    inputs:
      DefaultVersion: true

  # pack solution into .zip file
  - task: PowerPlatformPackSolution@2
    inputs:
      SolutionSourceFolder: './solutions/[solution-folder-name]'
      SolutionOutputFile: '$(Build.ArtifactStagingDirectory)\solutions\[solution-name].zip'
      SolutionType: 'Managed'

  # import the solution into the test environment
  - task: PowerPlatformImportSolution@2
    inputs:
      authenticationType: 'PowerPlatformSPN'
      PowerPlatformSPN: [test-env-service-connection]
      SolutionInputFile: '$(Build.ArtifactStagingDirectory)\solutions\[solution-name].zip'
      AsyncOperation: true
      MaxAsyncWaitTime: '60'

  # import the solution into the prod environment
  - task: PowerPlatformImportSolution@2
    inputs:
      authenticationType: 'PowerPlatformSPN'
      PowerPlatformSPN: [prod-env-service-connection]
      SolutionInputFile: '$(Build.ArtifactStagingDirectory)\solutions\[solution-name].zip'
      AsyncOperation: true
      MaxAsyncWaitTime: '60'
Make sure to replace [test-env-service-connection], [prod-env-service-connection], and [solution-folder-name] with their respective values from your unique configuration.
With our pipeline code added, let's Save and run. If you have branch security enabled, you may need to Create a new branch for this commit and then submit a pull request (PR). Otherwise, we can Commit directly to the main branch.
If this is a new pipeline, you'll also need to grant your pipeline access to the service connections.
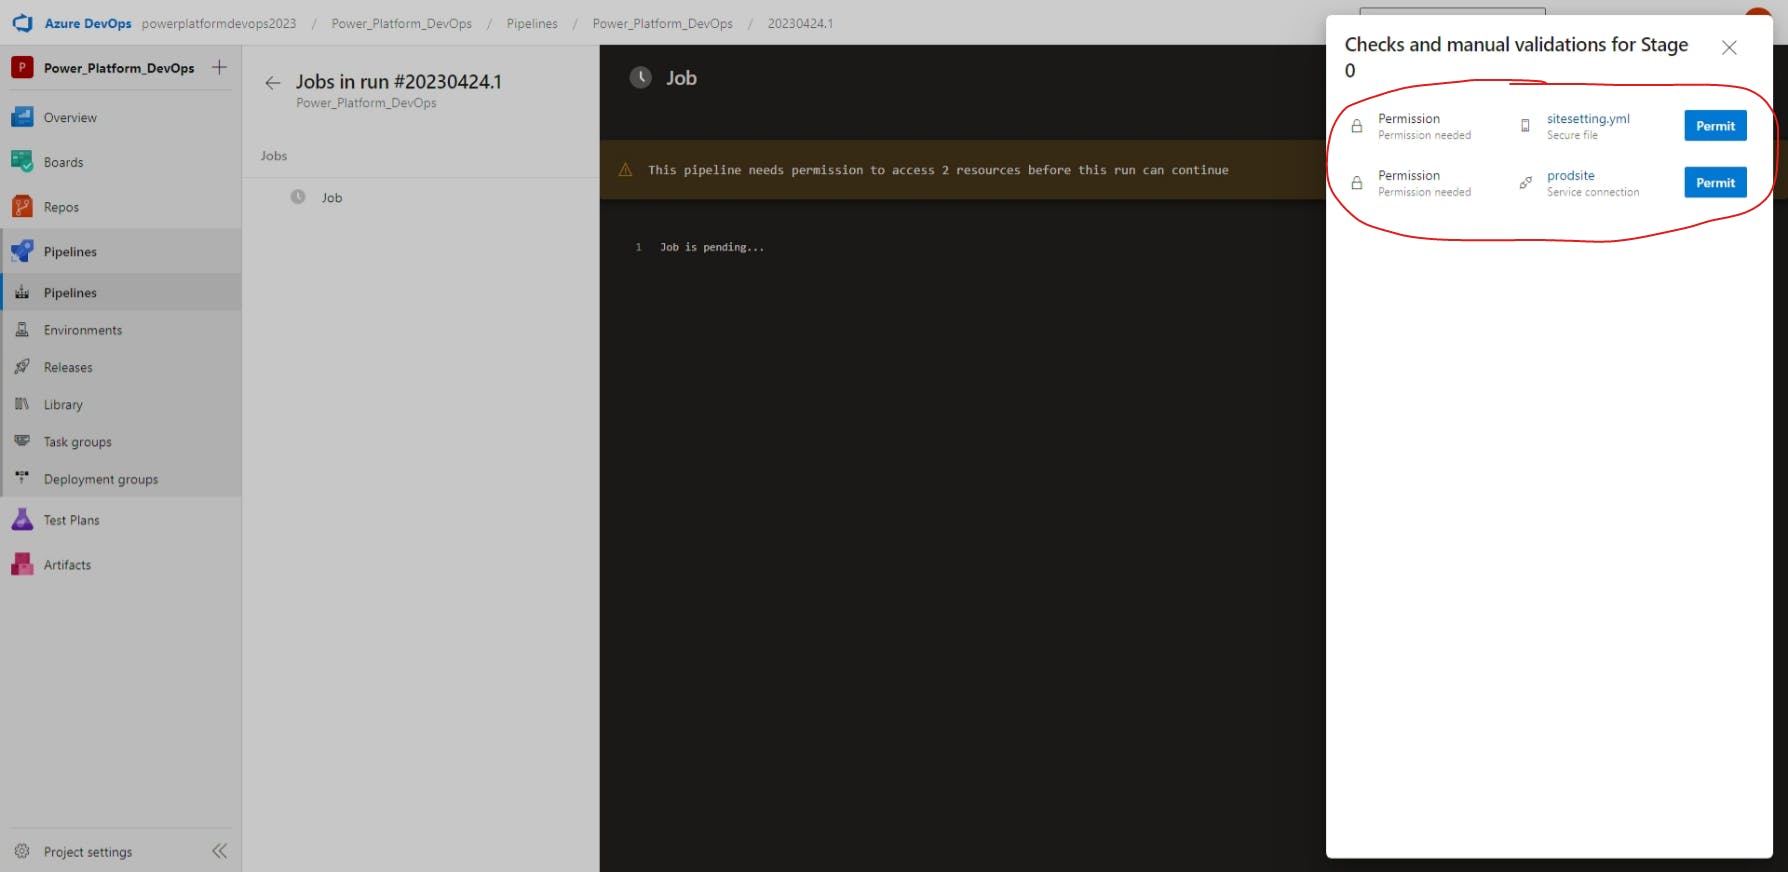
Once you've granted access, your pipeline will now run, deploying any solution changes from your Dev environment to your Test and Prod environments.
Conclusion - Next steps
Great job! You've now configured a true CI/CD pipeline for deploying your Power Platform solution. This is a HUGE improvement over just a single environment for your Power Platform solution, or even over manually uploading components from one environment to another.
Thanks for reading and, if you found this article useful, please consider sharing it across your network so others may be able to benefit from this information.
Take care!